If Candy Crush Soda Saga came with your Windows 11 or 10 PC and you want it gone for everyone, or it keeps coming back after you remove it, a few PowerShell commands can help. This guide will show you how to remove it from your own account, how to remove it for all users on the PC, and how to stop Windows from suggesting apps like it.
Also see: How to Uninstall Games on Windows 11
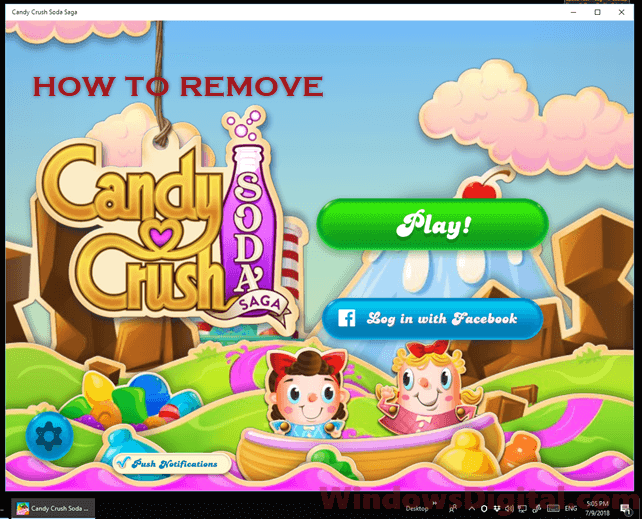
Why does Candy Crush Soda Saga stay on the PC after you uninstall it?
You may never have chosen to install this game at all. Some PCs came with it pre-installed, and Windows 10 could also add promoted apps like it by itself when you first signed in, as part of a feature called Microsoft Consumer Experience.
Microsoft Store apps also work differently from regular programs, because each one is installed per user account. Uninstalling the game usually removes it only from your own account, while other accounts on the PC keep their copies. If Windows holds a “provisioned” copy of the game, it also installs that copy for every new account.
That’s why uninstalling it from one account doesn’t clear it from the whole PC, and why you need different commands for that.
Try uninstalling it the normal way first
If you’re the only person using the PC, this might be all you need. Here’s how to do it:
- Click “Start” and type “Candy Crush“.
- Right-click “Candy Crush Soda Saga” in the search results and select “Uninstall“. The screenshot here is from Windows 10, so your menu may look a little different.

- If Windows asks you to confirm, select “Uninstall” again.
On Windows 11, you can also go to Settings > Apps > Installed apps, select “More” next to the game, and then select “Uninstall“.
Search for the game in Start again afterward. If it no longer shows up, it’s gone from your account.
What if there’s no “Uninstall” option?
The game might not actually be installed. Its icon can be pinned to Start without the app being on your PC, in which case you can right-click the icon and select “Unpin from Start” instead.
Remove Candy Crush from your account using PowerShell
If the normal way didn’t remove it, or you’d rather use commands, you can remove the game from your own account with PowerShell. To do that, you first need the game’s full package name, which is long and includes its version number. The screenshots below are from Windows 10, but the commands are the same on Windows 11.
Follow the steps below:
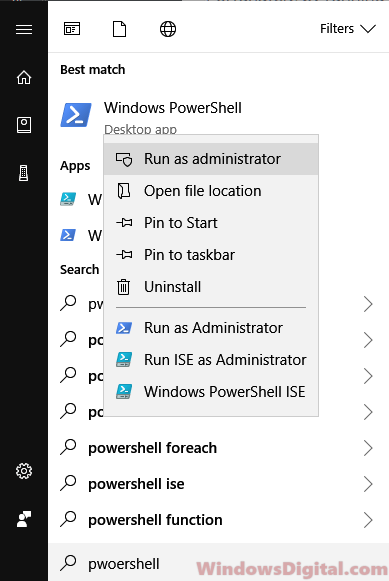
- Click “Start” and search for “PowerShell“.
- Right-click “Windows PowerShell” in the search results and select “Run as administrator“. If your own account isn’t an administrator, open PowerShell normally instead, because these commands act on whichever account PowerShell is running as.
- Enter the following command to show the game’s details:
Get-AppxPackage -Name king.com.CandyCrushSodaSaga

If it doesn’t show anything, you might have the other game, so try this one instead:Get-AppxPackage -Name king.com.CandyCrushSaga
- Find the “PackageFullName” line and copy the entire value next to it. It looks like
king.com.CandyCrushSodaSaga_1.117.500.0_x86__kgqvnymyfvs32, though yours will have a different version number.
- Type
Remove-AppxPackage, add a space, paste the name you just copied, and press Enter. It should look something like this:Remove-AppxPackage king.com.CandyCrushSodaSaga_1.117.500.0_x86__kgqvnymyfvs32

To check that it worked, run the command from step 3 again. If it doesn’t show anything, the game is gone from your account.
Linked issue: Get-AppxPackage is Not Recognized or Access is Denied
Remove Candy Crush Soda Saga for all users
According to Microsoft, the remove command above only affects the current account. To clear the game from the whole PC, you need to do two things: remove it from every existing account, then remove the provisioned copy so that new accounts don’t get it.
Note: These commands remove every Candy Crush game from every account on the PC, not just Soda Saga. If someone else on the PC plays one of them, check with them first.
Here’s what you should do:
- Open “Windows PowerShell” as administrator, the same way as above. You need administrator rights for these commands.
- Enter the following command to remove the game from every existing account:
Get-AppxPackage -AllUsers *CandyCrush* | Remove-AppxPackage -AllUsers
- Enter the following command to remove the provisioned copy. If your PC doesn’t have one, the command just finishes without showing anything, which is normal.
Get-AppxProvisionedPackage -Online | Where-Object DisplayName -like "*CandyCrush*" | Remove-AppxProvisionedPackage -Online -AllUsers
- To check that it worked, enter these two commands one by one, and press Enter after each:
Get-AppxPackage -AllUsers *CandyCrush*
Get-AppxProvisionedPackage -Online | Where-Object DisplayName -like "*CandyCrush*"
If neither one shows anything, Candy Crush is gone from all accounts, and new accounts won’t get it from that copy.
Related guide: Install or Uninstall Windows 11 Snipping Tool via PowerShell
Stop Windows from suggesting apps like Candy Crush
Windows can also promote apps in the Start menu, so it’s worth turning that off too. Follow the steps below:
- Open “Settings” and go to Personalization > Start.
- On Windows 11, turn off “Show recommendations for tips, shortcuts, new apps, and more“. On Windows 10, turn off the toggle for showing suggestions in Start.
After that, check the Start menu to see if the suggestions are gone.
Might be useful: How to Remove “Recommended” From Start Menu in Windows 11
You may also come across a Group Policy called “Turn off Microsoft consumer experiences” (under Computer Configuration > Administrative Templates > Windows Components > Cloud Content). It covers things like Start suggestions and apps installed after Windows setup, but Microsoft only lists it for Enterprise and Education editions, not Pro, so on most home PCs it isn’t an option. Some guides suggest a registry edit for Home edition instead, but since Microsoft doesn’t list it for Home, I wouldn’t count on it.
What if it comes back later?
The game can come back after a restart or a Windows update, although Microsoft doesn’t confirm this. On Home or Pro, I don’t know of a setting that guarantees it won’t happen, so if it does come back, just run the two commands from the all-users section again.