If you need to resize a large number of images, instead of resizing them one by one, you can resize the images or photos in bulk using a powerful tool called Microsoft PowerToys. PowerToys has a feature called Image Resizer that allows users to quickly resize multiple images at once. This guide will show you how to batch resize images in Windows 11 using PowerToys Image Resizer.
You may also like: How to Reduce Photo File Size in Windows 11
How to batch resize images in Windows 11
First, download PowerToys from https://github.com/microsoft/PowerToys/releases/. Check the “Asset” section in the latest release post to download the latest release of PowerToys. Once downloaded, run the installer to install the software.
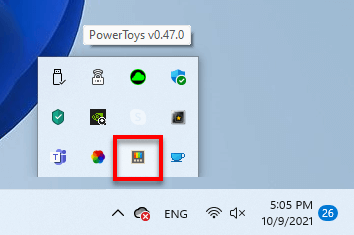
Once the setup is completed, run PowerToys from the Start menu or desktop. In most cases, PowerToys will start minimized. You may need to go to the taskbar corner and click on PowerToys icon to open its window.
In PowerToys window, click Image Resizer from the left pane. Then, make sure the “Enable Image Resizer” option is turned on.
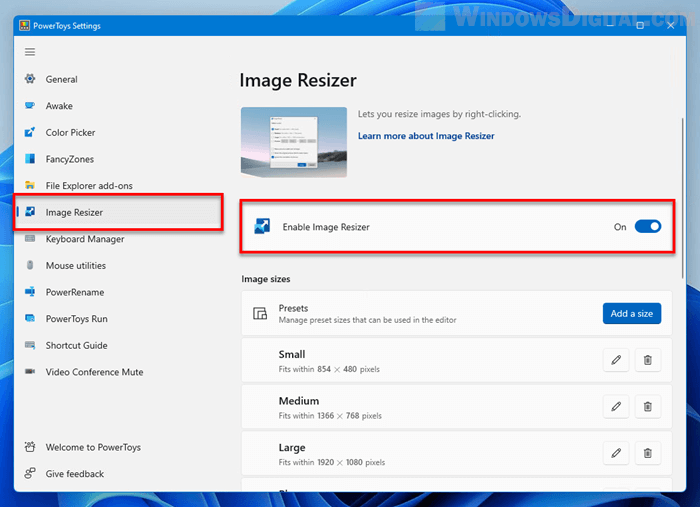
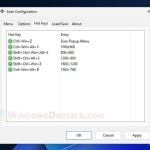
From there you can configure other options such as adding a preset size that can be used while resizing your images, choosing a fallback encoder, setting a filename format, etc.
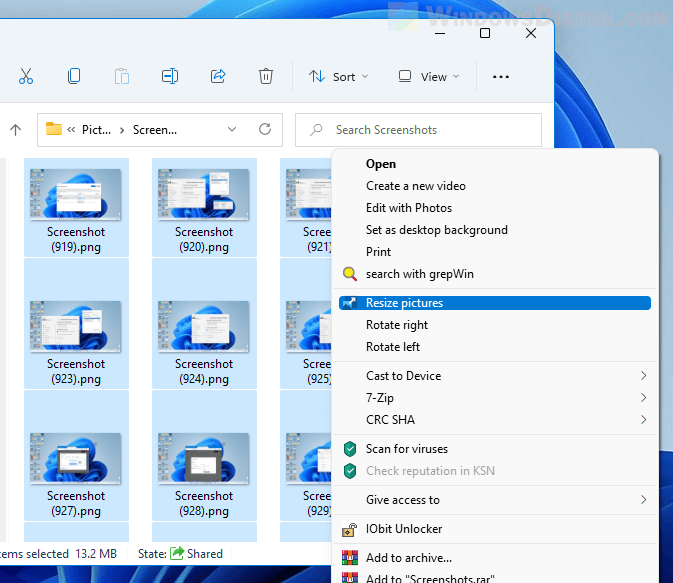
After enabling the Image Resizer feature in PowerToys, there will be an option called Resize pictures in the context menu when you right-click one or more images in Windows.
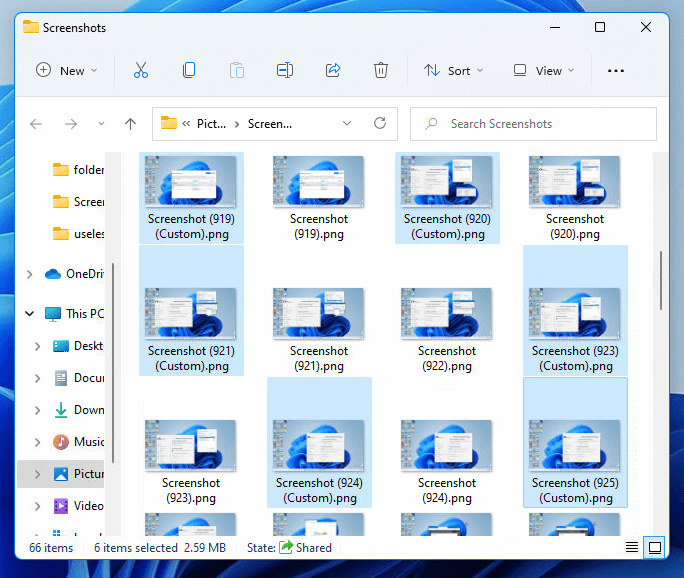
To resize multiple images at once, right-click and drag to highlight all the images you want to resize in bulk, select Show more options (Windows 11) > Resize pictures.
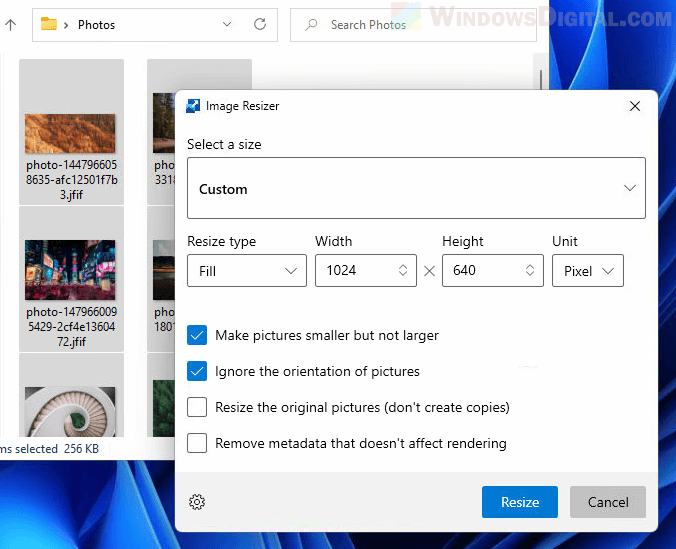
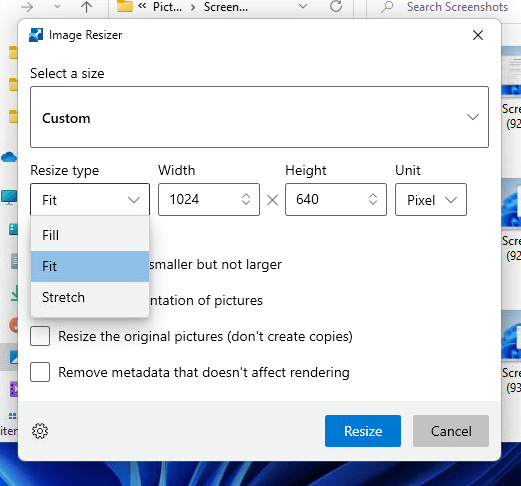
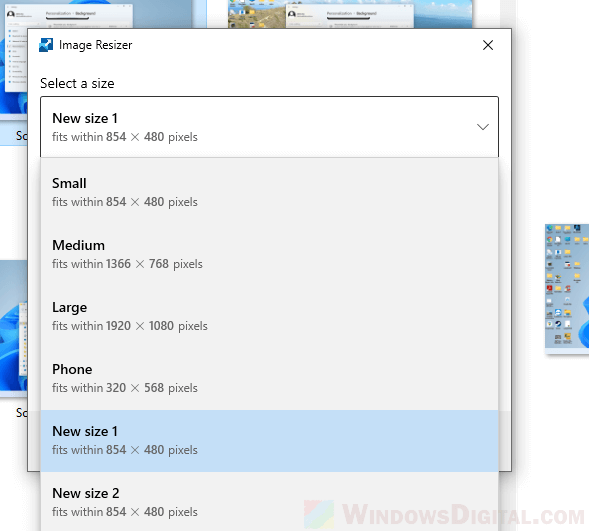
Next, select a size according to your need. The available fixed sizes are Small, Medium, Large and Phone. You can select Custom to manually enter a specific width and height to resize your images to.

If you select Custom size, you will need to choose a Resize type.
- Fill will increase or decrease the width of the photo so that it fits on the screen.
- Fit will increase or decrease the height of the photo so that it’s filled on the screen.
- Stretch will forcefully fit the picture to the entire screen, thus, it may result in the picture being distorted.
If the “Make pictures smaller but not larger” option is enabled, the resizer will resize only the pictures larger than the size you have chosen. It will ignore all images that are already smaller than the selected size.
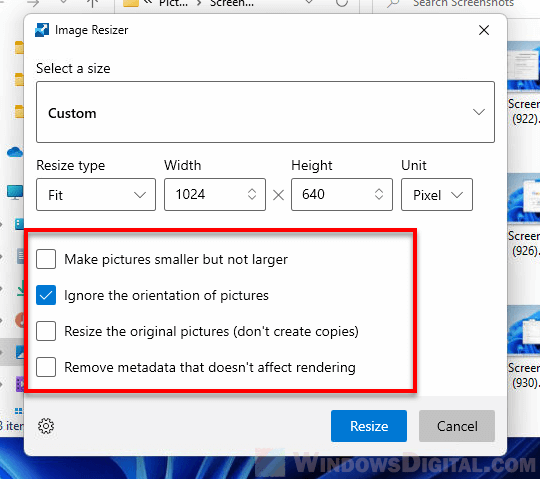
The “Ignore the orientation of pictures” option is enabled by default. This setting will swap the width and height to match the orientation (portrait or landscape) of the image. It means that when checked, the resizer will apply the smallest number of the width and height in the settings to the smallest dimension of the picture, regardless if it’s width or height.
If “Resize the original pictures (don’t create copies)” is checked, the resizer will overwrite the existing pictures after resizing them. This option is not recommended unless you have already make backup of your pictures elsewhere.
The “Remove metadata that doesn’t affect rendering” option will remove metadata (that doesn’t affect rendering) of the pictures after resizing them. Picture’s metadata are data such as creation date, modified date, picture size, location info, file type, width and height, color type, bit depth, compression method, filter, interlace, pixels per unit, etc.
After selecting the size you want to resize your images to and enabling or disabling relevant options, click Resize to resize all selected images at once.
If the “Resize the original pictures” option is disabled, the resized images will be created in the same directory with the type of size added to the name of files, for example, Screenshot (Custom). If you don’t see the resized images after resizing them, refresh the directory.
Add a preset size for Image Resizer
To add a preset size so that you don’t have to manually enter a custom size every time you resize your photos, open PowerToys Settings and navigate to Image Resizer. Under Image sizes, click Add a size next to Presets. Next, click the edit button next to the new size. Select a Fit type and enter a custom width and height.
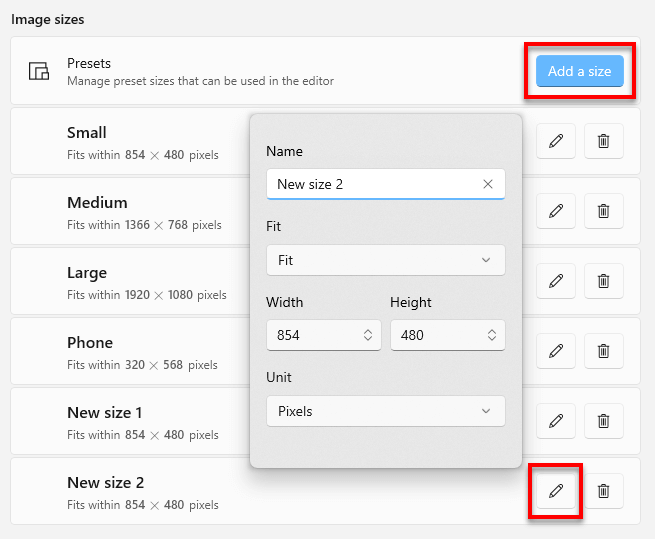
The added size will be available as an option in the Image Resizer window after right-clicking images and selecting Resize pictures.
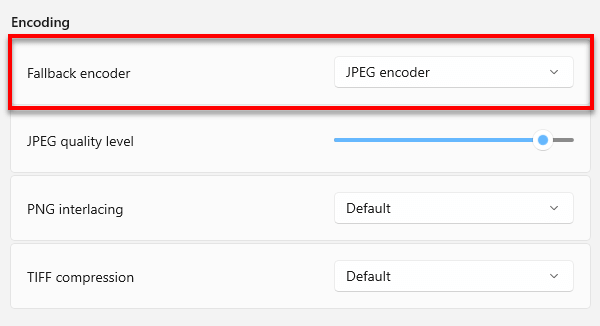
Choosing a fallback encoder
The fallback encoder option allows you to choose an encoder the resizer will use when the image file cannot be saved in its original format. As stated in the documentation, this option is not a file type conversion tool, but only works as a fallback for unsupported file formats.
For more info about what other options do, go to: https://docs.microsoft.com/en-us/windows/powertoys/image-resizer