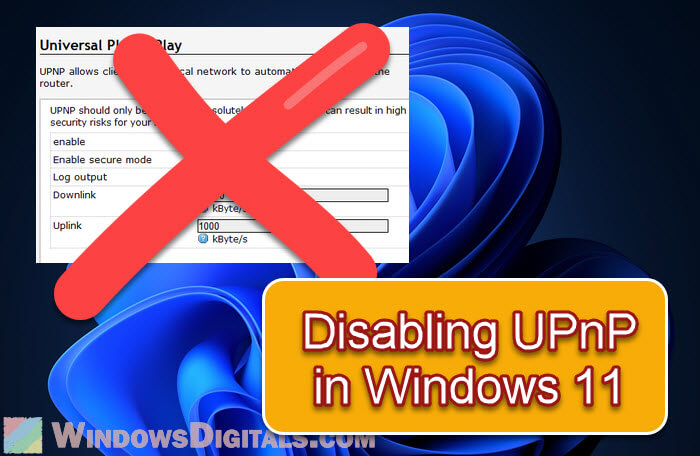
Universal Plug and Play (UPnP) is a way for devices on a network to find each other and share resources without any action on your side. It makes connecting devices and forwarding ports much easier, but it can also open doors for many security problems. In this guide, we’ll talk about why turning off UPnP can sometimes be something you should do and show you how to disable it on Windows 11.
Also see: 30+ Windows 11 Services to Disable for Gaming Performance
Page Contents
The risks of having UPnP enabled all the time
UPnP makes port forwarding and communication between devices easier and automatic, but it’s not always a good practice. The following are some problems that UPnP can cause when left enabled:
- UPnP doesn’t check who’s trying to connect, so any device can hop on and mess with your devices.
- It can open up pathways in your router all by itself, which might let hackers sneak in and steal your data.
- Since every device might do UPnP differently, there could be weak spots that hackers can use to break into your network.
- Internet of Things (IoT) devices love UPnP for easy setup, but their security isn’t always strong and they are often the easy targets.
Because of these issues, turning off UPnP can, in a sense, help keep your network and personal info safe.
Recommended guide: How to Disable Proxy Settings in Windows 11/10 Permanently
Disabling UPnP in Windows 11
Method 1: Using the Services application
Here’s how to stop UPnP on your Windows 11 PC using the Services app:
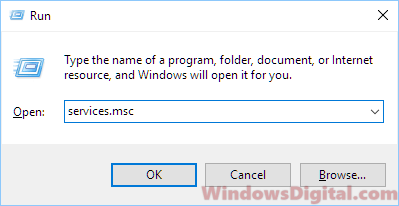
- Open the Services app: Press Win + R, type services.msc, and click OK.
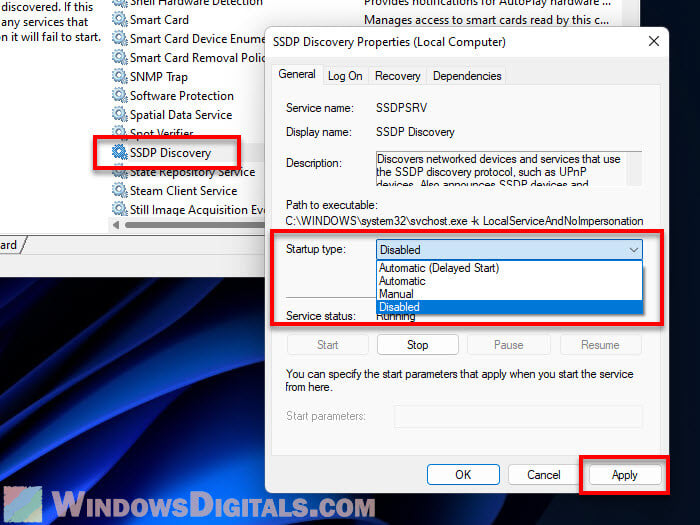
- Find the SSDP Discovery Service: This service handles UPnP in Windows.
- Turn off the SSDP Discovery Service: Right-click it, choose Properties, set Startup type to Disabled, stop it if it’s running, and hit OK.
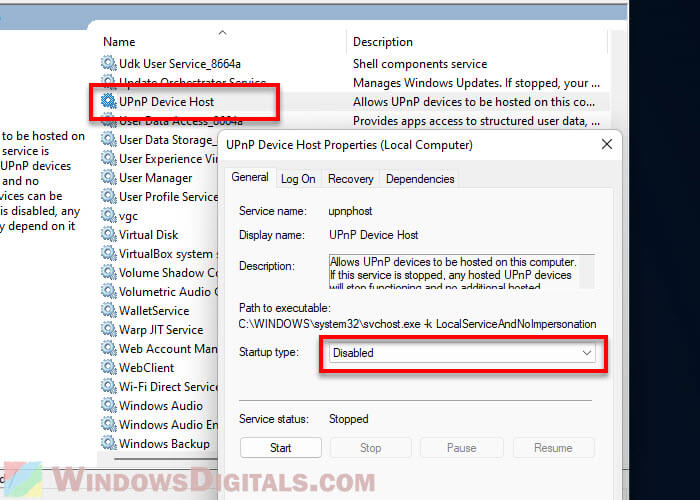
- Find the UPnP Device Host service: This service lets your PC host UPnP devices.
- Turn off the UPnP Device Host service: Right-click, go to Properties, set to Disabled, stop it if needed, and click OK.
- Close the Services window.
Related resource: How to Disable VPN in Windows 11
Method 2: Using the Registry Editor
You can also turn off UPnP using the Registry Editor, but be careful because messing up the registry can cause very serious problems. Always create a system restore point or back up your registry first.
- Open the Registry Editor: Press Win + R, type regedit, and click OK. If asked, say Yes.

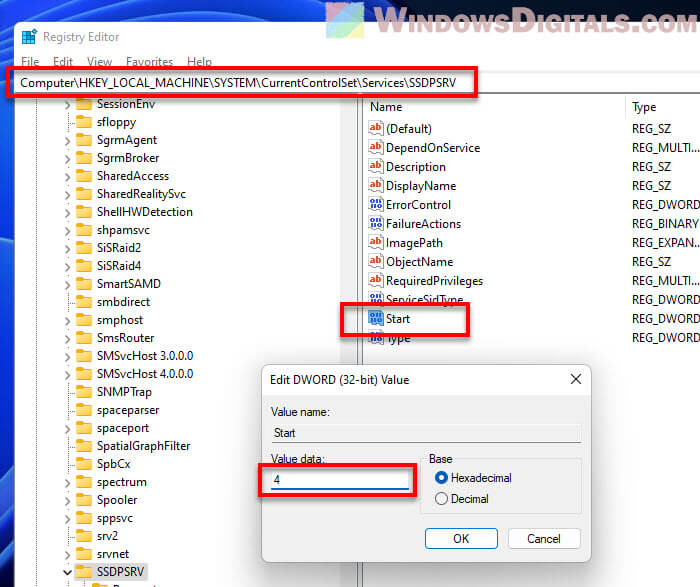
- Go to the SSDP Discovery Service key:
HKEY_LOCAL_MACHINE\SYSTEM\CurrentControlSet\Services\SSDPSRV
- Change the Start value: Double-click Start, set it to 4 (Disabled), and hit OK.
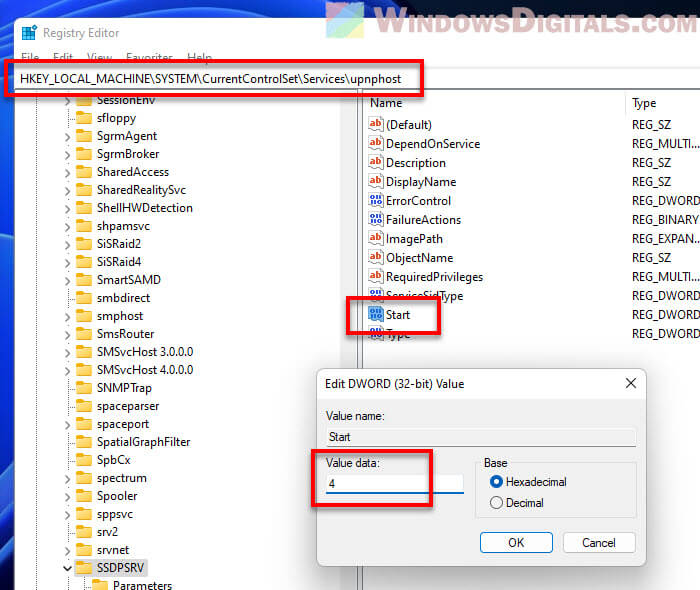
- Go to the UPnP Device Host service key:
HKEY_LOCAL_MACHINE\SYSTEM\CurrentControlSet\Services\upnphost
- Change the Start value: Double-click Start, set it to 4, and click OK.
- Close the Registry Editor.
- Restart your PC.
More ways to keep your network safe
Turning off UPnP on Windows 11 is a good start to better protect your home network. But, there’s more you can do to make it even safer. The following are things you should consider:
- Make sure your router’s software is always the latest. This helps fix security weak spots.
- Change your router’s factory-set login info to something only you know. This keeps strangers out.
- If you can, turn on WPA3 encryption for your Wi-Fi. It’s the newest and most secure. If not, WPA2 is still good.
- Turn off the option to change your router settings over the internet. This stops hackers from messing with your network from far away.
- Use a really strong Wi-Fi password. Make it something unique and tough to guess.
- Set up a separate Wi-Fi for guests. It can keep your main network safer.
- Don’t use Wi-Fi Protected Setup (WPS). It’s meant to make connecting devices easy, but it can also make it easy for hackers.
- Keep all your devices and drivers updated. This closes loopholes hackers might exploit.
- Adding a firewall to your network is like having a guard. It watches for trouble coming in or going out and stops it.
- Think about using a VPN. It scrambles your internet traffic, making it hard for hackers to spy on you.
What you might miss without UPnP
Before disabling UPnP, I think it’s important that you know what you might miss without UPnP. It’s pretty much about making things easier for you. UPnP helps your devices to find each other and communicate without any work from your end. This comes in very handy when you’re setting up things like printers, gaming consoles, and all those smart gadgets at home quickly. Without UPnP, you might end up having to manually input the settings, which is usually quite time-consuming.
However, having UPnP enabled means you might have certain security risks in your network. Though, most people actually neglect this and keep their UPnP on all the time. If you value your security more and you don’t actually use UPnP at all, you might want to just turn it off.