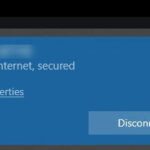
Windows 11 or Windows 10 keeps showing “Can’t connect to this network” error when you try to connect to a WiFi or Hotspot network? We’ve compiled a list of popular solutions to the “can’t connect to this network” error that have actually solved the issue for many other users who faced the same problem.
Page Contents
How to fix “Can’t connect to this network” on Windows 11/10 laptop
First you need to make sure that there is at least one other device that is able to connect to the WiFi that you have problem with. This is to confirm that the issue isn’t on the WiFi network side.
If the issue lies with the WiFi network and if it’s a public WiFi that you have no control over, there is nothing you can do on your side to fix the problem other than contacting the admin of the WiFi network to fix it on their side.
If it’s your own home WiFi that you have issue with, the very first thing you should try is to reboot both your modem and router (by unplugging them, wait for at least 30 seconds and plugging them back). If the problem persists, try the solutions below.
Forgetting the WiFi network and restart PC
There are times where a saved and remembered WiFi network might be glitched especially if there has been any changes on either the WiFi network side or your PC.
What worked for most people is to simply forgetting the network and fresh connect to it again, preferably after a complete PC reboot. Here’s how to forget a WiFi network on Windows 10/11.
First, click on the network icon from the taskbar on Windows 11 or 10 desktop. Then, right-click on the problem WiFi network and select Forget.
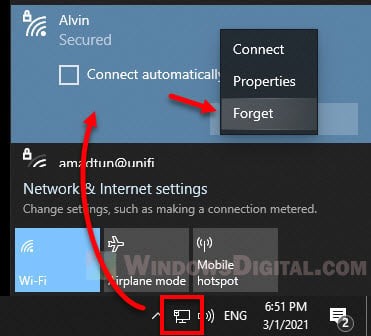
Now, restart your computer. After reboot, try to connect to the WiFi network again and see if the “Can’t connect to this network” persists. It will require you to enter the password for the WiFi network again since it’s has already been forgotten.
Uninstall and reinstall network adapter driver
It may also be caused by incorrect, outdated or glitched wireless network adapter. Try to uninstall your network adapter and reinstall it.
Before uninstalling your wireless network adapter, make sure your laptop or the wireless adapter is not too old or that you have a backup driver installation CD just in case Windows couldn’t find the driver for you.
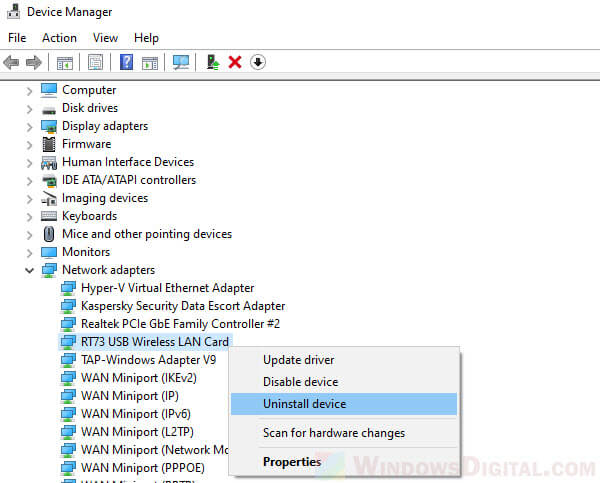
To uninstall wireless network adapter, on Windows search bar, search for and open Device Manager. In Device Manager, expand Network adapters. Right-click on your wireless network adapter, and then select Uninstall device.
After uninstalling the device, restart your PC to allow Windows to automatically detect and install the latest driver for your wireless adapter. Then, try to connect to the WiFi network again.
Note:
There are two ways to reinstall a wireless network adapter’s driver in Windows 11 or Windows 10. The easiest method is to simply restart your PC and allow Windows to automatically detect and search for the latest driver for your wireless adapter upon restart (this can only be done if Windows Update is turned on).
If Windows doesn’t automatically install the driver, you can try to manually run Windows Update and see if it can find the driver for your network adapter.
If not even Windows Update could find the driver, which is very unlikely if you laptop or wireless adapter is not older than 10 years old, you need to manually install the driver via either the driver installation CD that comes with your laptop / wireless adapter, or manually search for and download the driver from your laptop or wireless adapter manufacturer website.
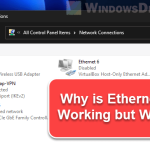
Temporary disable Ethernet network adapter
If you have multiple network connected, for example, the Ethernet network (via cable) and wireless network, try to temporary disable the Ethernet network and see if the wireless network adapter is able to connect to the WiFi network without popping up the “Can’t connect to this network” error.
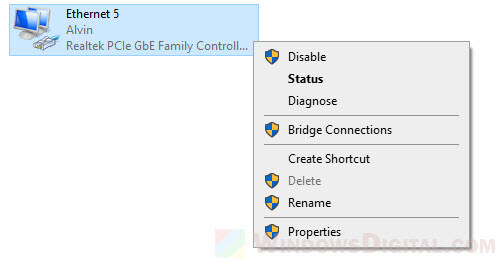
To disable a network adapter, open Settings in Windows 11/10 and navigate to Network & Internet > Advanced network settings > Change adapter options. Right-click on your Ethernet network adapter and click on Disable.
Now, try to connect to the WiFi network again and see if the problem persists.
To re-enable the Ethernet network adapter, repeat the same steps and click on Enable after right-clicking the Ethernet network adapter.
Change the 802.11 channel width to 20mhz
Some users have reported that by changing the 802.11 channel width of your wireless network adapter to 20mhz may fix the issue.
Not all wireless network adapters have the 802.11 channel width setting. You can try the steps below to see if the setting exists. If it does, try to change it to 20mhz to see if it resolves the “Can’t connect to this network” issue.
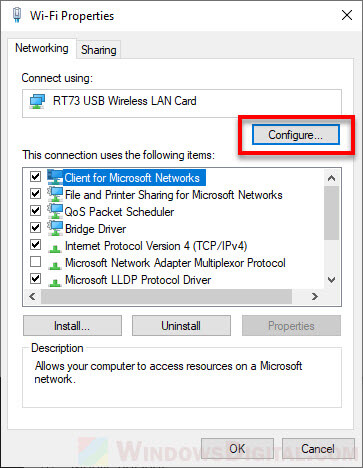
Open Settings on Windows 10/11 and navigate to Network & Internet > Change adapter options. Next, right-click on your wireless network adapter and select Properties. In the Wi-Fi properties window, click on Configure.
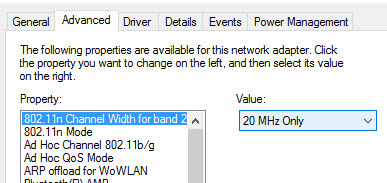
In the Advanced tab, under Property, look a setting called 802.11 Channel Width and select it. Under Value, change it to 20 MHz only.
Now, try to connect to the problem WiFi network again and see if the error persists.
“Can’t connect to this network” when connecting to Mobile Hotspot
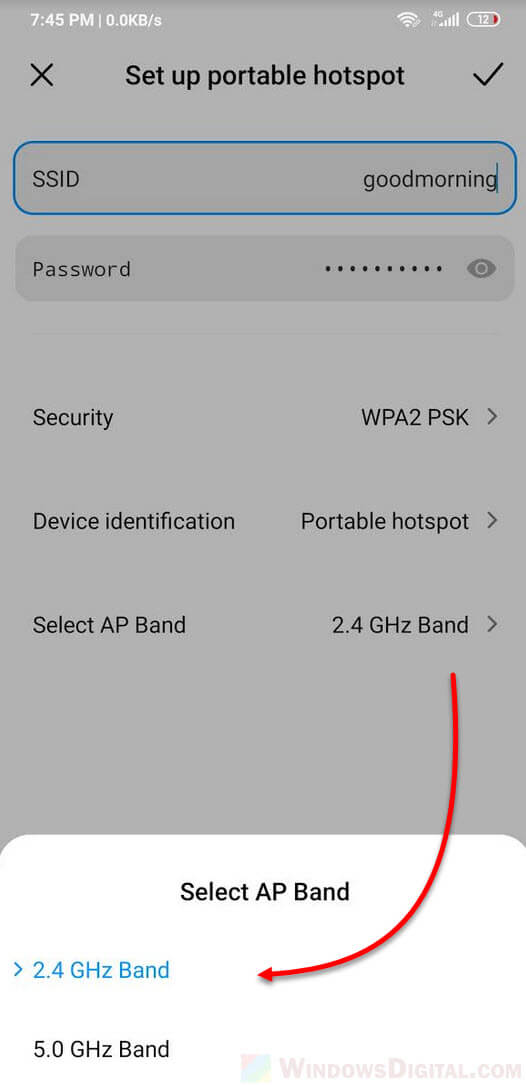
If you see the “Can’t connect to this network” error when you try to connect to a mobile hotspot created by your mobile phone, try to change the AP Band of the hotspot to 2.4 GHz. The AP Band setting represents the wireless frequency used to connect other device to your mobile hotspot. There is a common issue some android devices create mobile hotpost on 5 GHz AP band by default which results in incompatibility with some of the older wireless network adapter on laptop computers or other devices.
To change the AP band of the mobile hotspot you’ve created on your Android device, navigate to the portable hotspot settings. Tap on set up portable hotspot. Under select AP Band, change to 2.4 GHz Band. Tap on save changes (usually a tick icon at the top).
Since the interfaces vary greatly between android devices, the name of the settings mentioned above may slightly differ. You may have to manually look for similar settings on your Android device if you have a different interface.