If you’ve set the Windows Update service to Disabled in Services, only to find it back on Manual (Trigger Start) a few minutes or hours later, even on a PC that never goes online, it’s not something you did wrong. Windows puts the service back by itself. This guide will explain why it keeps happening and what you can use instead to stop updates from installing on their own.
Also see: How to Restart Windows Update Service on Windows 11
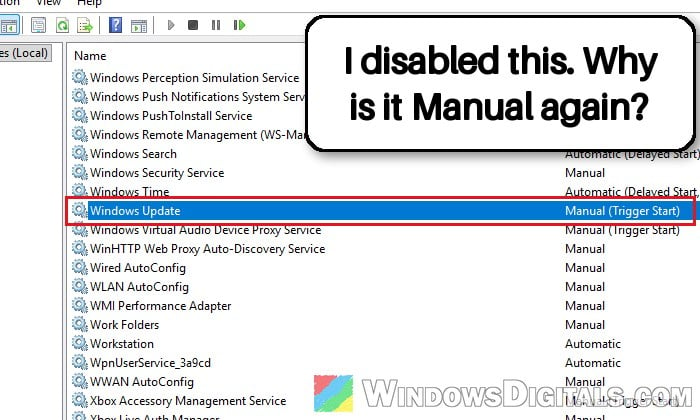
Why does the Windows Update service keep changing back to Manual?
Disabling the service just isn’t how Windows expects you to stop updates anymore. According to Microsoft, stopping and disabling the Windows Update service used to work in older versions of Windows, but it’s no longer the supported method for disabling automatic updates. Windows now has policies and settings for that instead.
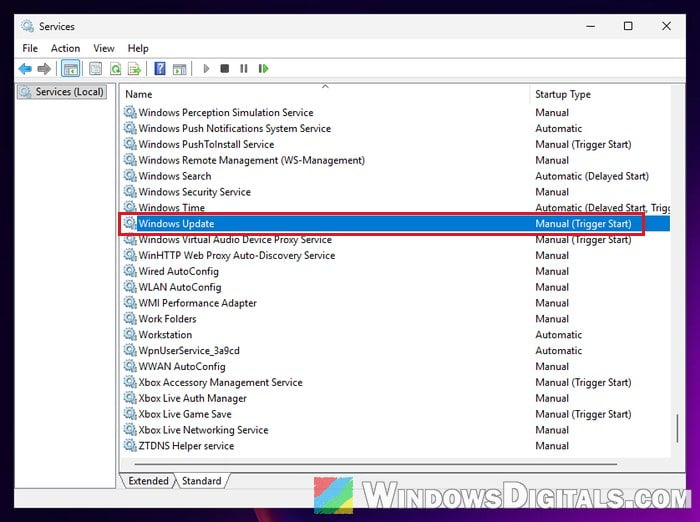
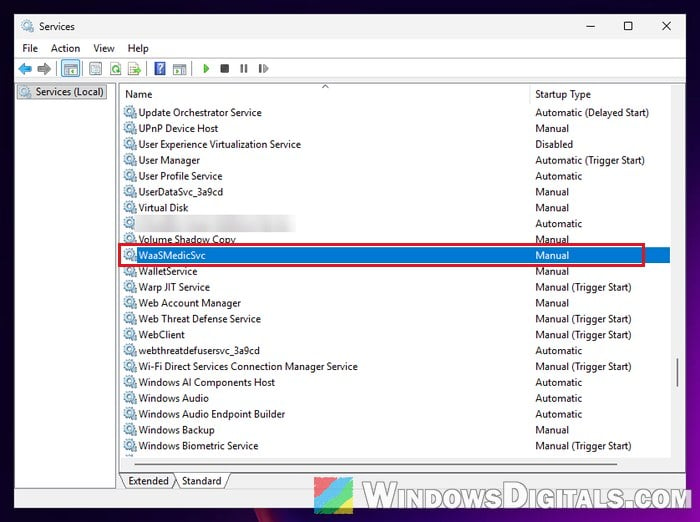
In practice, the repair tools built into Windows look after Windows Update, such as the Windows Update Medic Service (on some PCs it shows up in Services only as WaaSMedicSvc) and the Update Orchestrator tasks in Task Scheduler. To them, a disabled Windows Update service is something broken, so they set it back to its default.
Even disabling the Medic service in the registry doesn’t reliably stop it, and the Update Orchestrator tasks refuse to be switched off (you get a permission error). It’s a pretty common complaint on Reddit and Microsoft’s forums, and it happens whether or not the PC is connected to the internet.
How to see when the service was changed
If you want proof of when it happened, Windows records it in the System log as Event ID 7040. The event says the start type of the Windows Update service was changed from disabled to demand start (which is what “Manual” means). It doesn’t say which part of Windows made the change, though. Here’s how to find it:
- Press Win + R, type
eventvwr.mscand press Enter. - Go to Windows Logs > System.
- Click Filter Current Log on the right, type “7040” in the Event IDs box, and click OK.
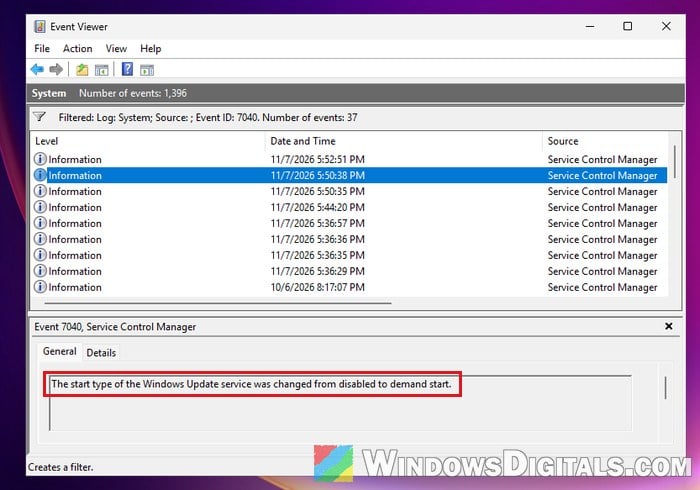
Each 7040 event marks a time a service’s start type changed, with the date and time beside it. Click one to see which service it was.
Does “Manual (Trigger Start)” mean it runs all the time?
No. A trigger-start service starts only when something needs it, instead of starting with Windows, and it can stop itself again once it’s idle. So “Manual” is the normal, default setting for Windows Update, not a sign that it’s busy downloading things in the background all day.
Instead of fighting the service, use one of the supported options below.
Linked issue: Update Orchestrator Service is Missing in Windows 11
Pause updates in Settings (any edition)
The simplest supported option is to pause updates, and it works on Windows 11 Home too. You can pause them for up to 35 days from today. Before the pause runs out, you can pick a new date to keep it going, but the new date can still only be up to 35 days from the day you change it (the days you already paused aren’t added on top).
Here’s how to do it:
- Press Win + I to open Settings, then select Windows Update.
- Next to Pause updates, click Pick a date and choose the day you want updates paused until.
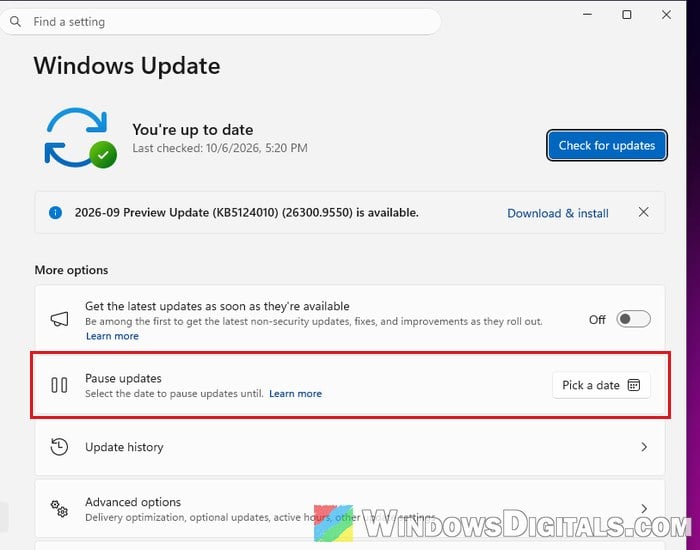
Pausing doesn’t permanently turn off automatic updates. When the pause ends, Windows checks for, downloads and installs the latest updates by itself, and you can also resume them any time. Also, any update that was being installed when you paused gets canceled. It’s still the safest way to hold updates off for a few weeks.
Might be useful: How to Delete Windows Update Files in Windows 11
Set “Configure Automatic Updates” in Group Policy (Pro and above)
The following method only works on Windows 11 Pro, Enterprise or Education, since the Group Policy Editor isn’t included in Home edition. If you’re using Home, please see the next section instead.
Microsoft says this is the supported way to turn off automatic updates. When it’s set to Disabled, you have to download and install any updates from Windows Update yourself. If you’d rather be told when updates are available, you can enable it with the “2 – Notify for download and auto install” option instead, and then download and install them yourself from Settings. Either way, leave the Windows Update service on Manual, because it still needs to start whenever you check for updates.
To set it up, follow the steps below:
- Press Win + R, type
gpedit.mscand press Enter. - Go to Computer Configuration > Administrative Templates > Windows Components > Windows Update > Manage end user experience.
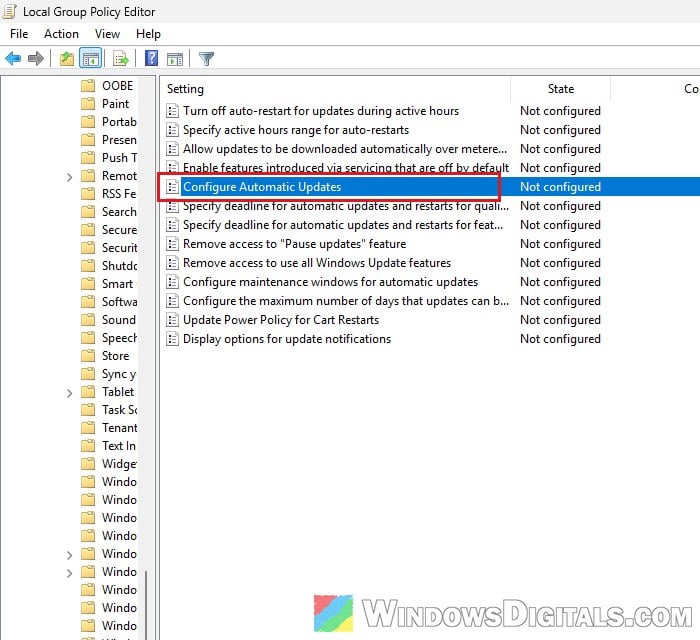
- Double-click Configure Automatic Updates.
- Select Disabled, or select Enabled and choose “2 – Notify for download and auto install” in the options below.
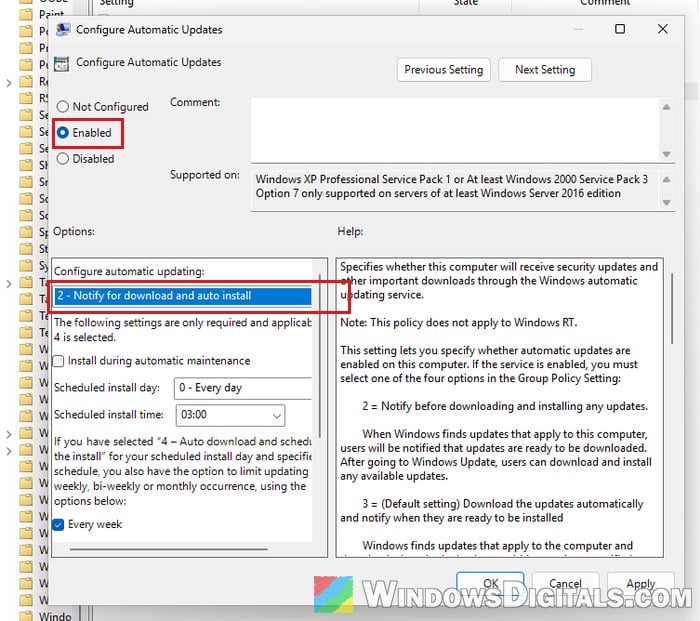
- Click OK, then restart your PC to apply it. You can also apply it right away by running this command in an administrator Command Prompt:
gpupdate /force
After that, updates should no longer install on their own. Whenever you want them, open Settings > Windows Update and install them from there.
Please note that the “Remove access to use all Windows Update features” policy in the same folder isn’t a replacement for this one. It only hides the “Check for updates” option from users, while background scans, downloads and installs carry on as configured.
Set your network as a metered connection (works on Home too)
For Windows 11 Home users, who don’t have the Group Policy Editor, setting your connection as metered is the most useful option besides pausing. On a metered connection, Windows Update only downloads priority updates, and other updates aren’t downloaded automatically. It’s not a complete stop, but it keeps most updates away until you decide to get them.
Here’s what you should do:
- Open Settings > Network & internet, then select Wi-Fi (or Ethernet for a wired connection).
- Select the network you’re connected to and turn on Metered connection.
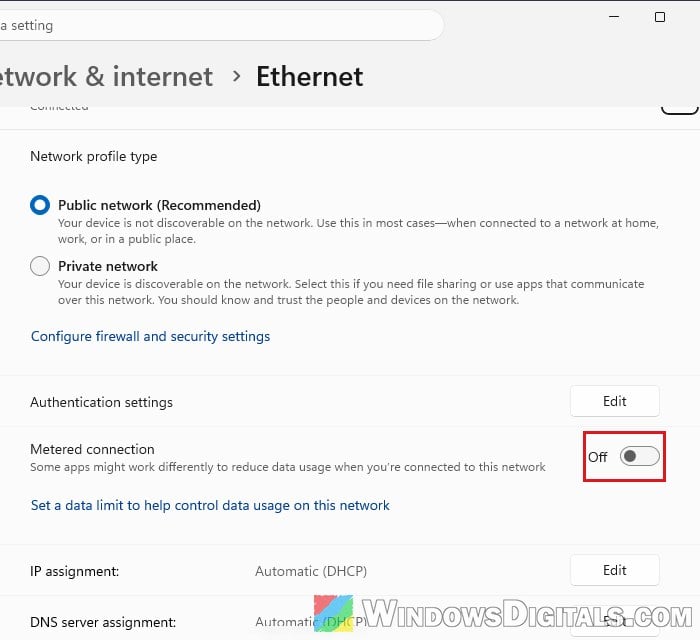
- Go to Settings > Windows Update > Advanced options and make sure “Download updates over metered connections” is turned off.
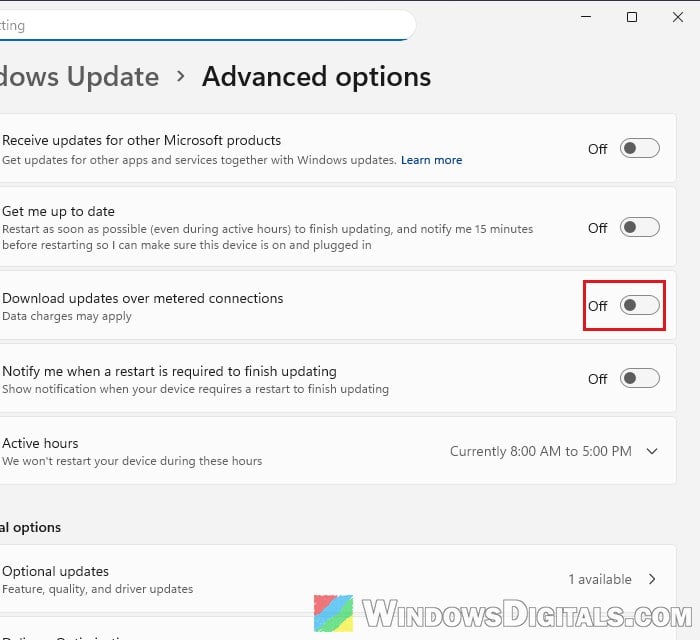
From then on, most updates won’t download on their own while you’re on that network.
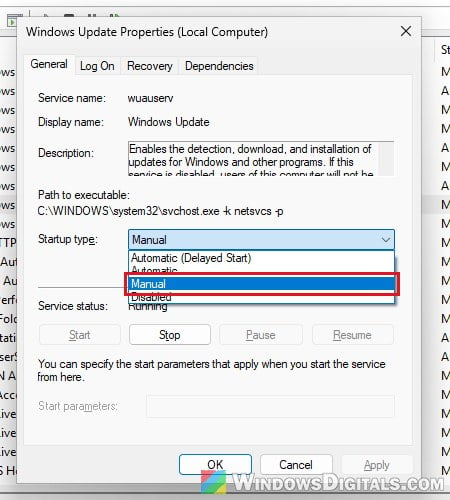
Put the Windows Update service back to Manual
If you’ve disabled the Windows Update service and Windows hasn’t reset it yet, set it back to Manual yourself. Leaving it disabled, or forcing it to stay disabled with permission tricks or third-party “update blocker” tools, can break more than just updates. The Microsoft Store may no longer update apps, other programs that rely on Windows Update or BITS may fail to update, and you can run into errors like Windows Update Error 0x80070424.
To set it back, follow these steps:
- Press Win + R, type
services.mscand press Enter. - Double-click Windows Update in the list.
- Set Startup type to Manual, then click OK.
Related problem: Services.msc “Startup Type” Greyed Out in Windows 11 or 10
Just keep in mind that Microsoft warns a PC without updates is left vulnerable unless it gets them some other way, so install them yourself every now and then, especially security updates.