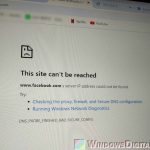
Chrome’s “This site can’t be reached” page usually ends with a code that tells you what went wrong, like DNS_PROBE_FINISHED_NXDOMAIN. For some people, though, it shows “DNS_PROBE_POSSIBLE” instead. This guide explains what the code actually means and how to fix the problem behind it on Windows 11 or 10.
Also see: “This site can’t be reached” on Google Chrome (Fix)
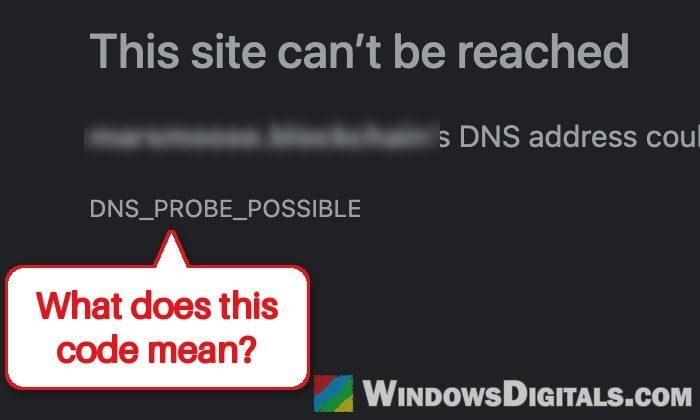
What does DNS_PROBE_POSSIBLE mean?
Every time you open a website, Chrome first has to look up its address through DNS (the system that turns a name like www.example.com into an IP address). When that lookup fails, Chrome shows its DNS error page and can run a quick check in the background, called a DNS probe, to find out why. The result is the code you normally see at the bottom of the page, for example DNS_PROBE_FINISHED_NXDOMAIN (the site’s name doesn’t exist) or DNS_PROBE_FINISHED_NO_INTERNET (no connection at all).
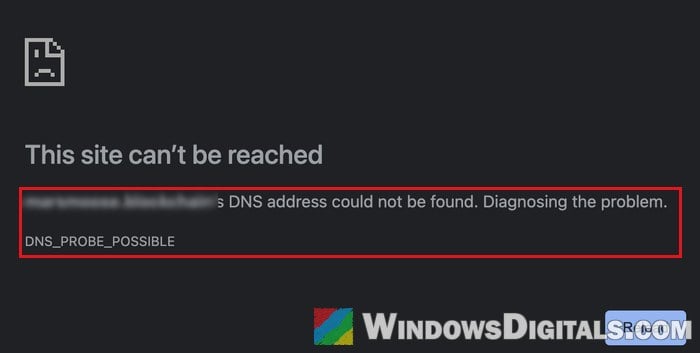
DNS_PROBE_POSSIBLE is not one of those results. According to Chromium’s source code (the open-source project Chrome is built on), it’s the starting status the error page holds until the browser sends it the probe’s result. The page with this code says the site’s “DNS address could not be found. Diagnosing the problem.” So when the page stays on DNS_PROBE_POSSIBLE, Chrome couldn’t look up the site’s address and never showed a more specific reason. It’s still a DNS failure, so the usual DNS suspects apply:
- A DNS server (your ISP’s, your router’s or one you set yourself) that’s slow, down, or won’t answer for that site.
- Chrome’s secure DNS setting pointed at a provider that isn’t working.
- A firewall, antivirus or VPN that blocks or intercepts Chrome’s connections.
- A router or PC that simply needs a restart, or old entries in the DNS cache.
The fixes below go through these one by one, starting with the quickest.
Linked issue: DNS_PROBE_FINISHED_NXDOMAIN Error in Chrome (Fix)
Quick checks before changing settings
It’s worth checking first whether it’s just one site, just Chrome, or every browser, since that tells you which fix to try first.
- Reload the page a couple of times. A DNS hiccup sometimes clears on its own.
- Open the same site in another browser (Edge or Firefox). If it works there, the problem is likely Chrome’s own settings or something blocking Chrome, so start with the secure DNS and firewall fixes below.
- Try the site on your phone using mobile data. If it doesn’t load there either, the site itself might be down, and there’s nothing to fix on your side.
- Restart your router and your PC. Google’s troubleshooting steps for Chrome connection errors include rebooting the modem and router, and sometimes that alone gets DNS working again.
Change or turn off Chrome’s secure DNS
Chrome can send its DNS lookups over an encrypted connection to a provider of your choice, a feature called secure DNS. According to Google, if you’ve picked a specific provider and that provider fails, Chrome won’t fall back to your normal DNS, so sites can’t be found. If your ISP’s DNS is the one failing, picking a working provider here lets Chrome skip it, and it only takes a minute.
- Paste
chrome://settings/securityinto Chrome’s address bar and press Enter. This opens the Security page under Privacy and security in Chrome’s settings. - Scroll down to Use secure DNS under Advanced. It’s on by default, with Select DNS provider set to OS default (when available), which means your normal DNS.
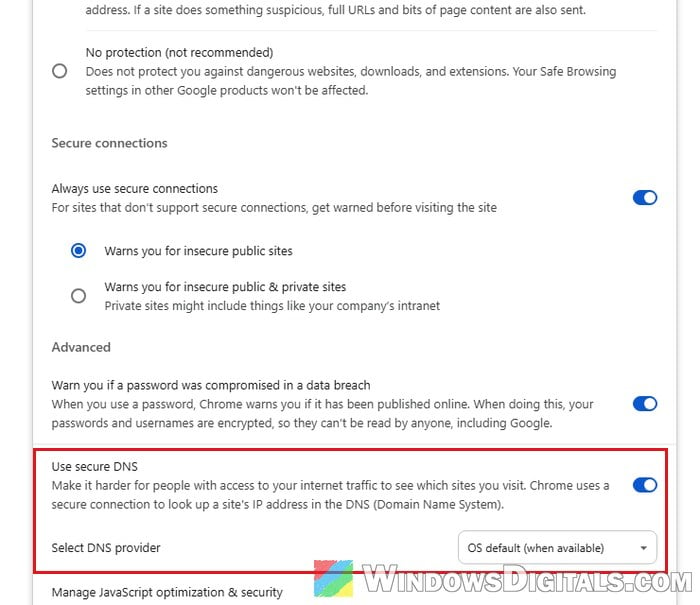
- If Select DNS provider shows a specific or custom provider, turn Use secure DNS off and try the site again.
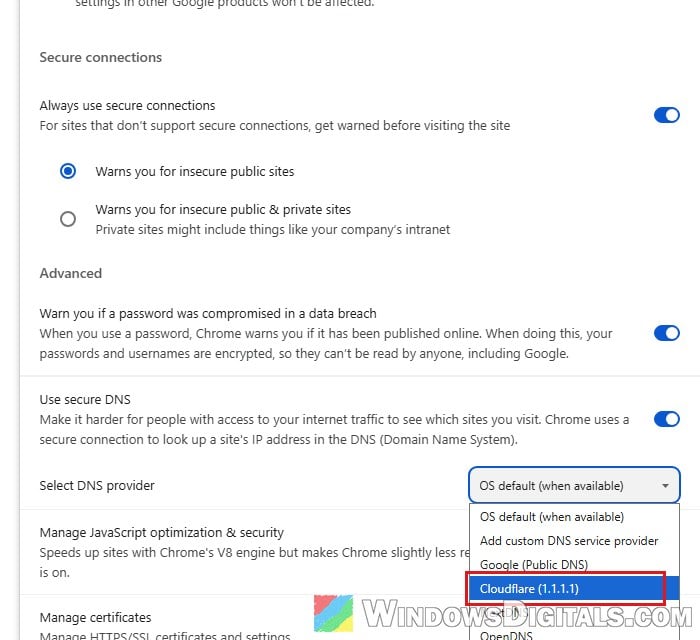
- If it’s set to OS default (when available) or turned off, turn it on, open the Select DNS provider list and pick a public provider, such as Cloudflare (1.1.1.1) or Google (Public DNS).
- Restart Chrome and open the site again.
Related problem: DNS_Probe_Finished_Bad_Secure_Config Only in Chrome
Clear Chrome’s and Windows’ DNS cache
Both Chrome and Windows keep a list of addresses they’ve looked up recently. If a bad answer got stored there, the error can keep coming back even after the real problem is gone. Clearing both lists takes a few seconds.
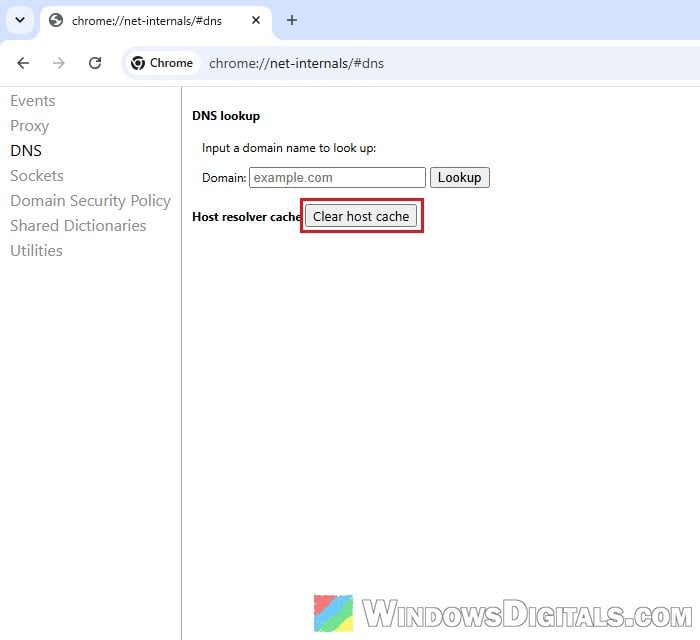
- In Chrome, paste
chrome://net-internals/#dnsinto the address bar and press Enter. - Click Clear host cache.
- Next, open Command Prompt as administrator.
- Type the following command and press Enter:
ipconfig /flushdns
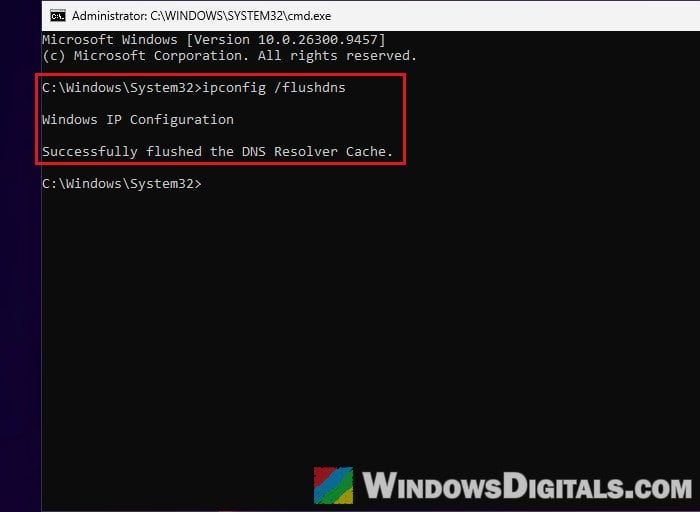
Close and reopen Chrome, then try the site again.
Make sure a firewall, antivirus or VPN isn’t blocking Chrome
When every site fails in Chrome while other browsers work, a security app that blocks Chrome is a common cause. Google’s Chrome help also says to make sure no firewall or antivirus is blocking the connection.
To check Windows Defender Firewall, follow the steps below:
- Open Control Panel and go to System and Security > Windows Defender Firewall.
- Click Allow an app or feature through Windows Defender Firewall.
- Click Change settings, find Google Chrome in the list, and make sure it’s ticked, along with its Private and Public boxes.
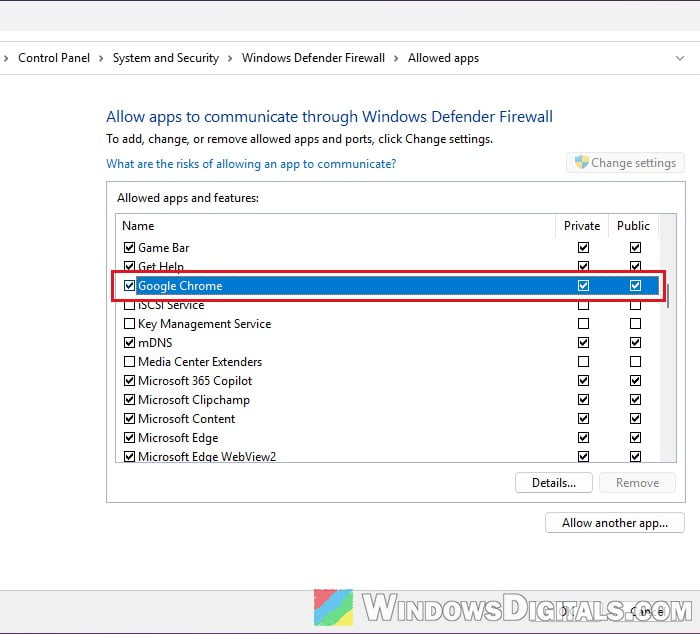
- Click OK.
If you use a third-party antivirus or firewall (Avast, AVG, Norton, and so on), add Chrome to its allowed list or turn its protection off for a moment to test. If you use a VPN or proxy, disconnect it and reload the page. Just remember to turn your protection back on afterwards.
Change the DNS servers in Windows
If the error shows up in other browsers too, the DNS server your PC uses is a likely cause. Switching Windows to a public DNS server such as Cloudflare or Google can fix it for all of them, not just Chrome.
- Open Settings > Network & internet, then select Ethernet, or Wi-Fi and your network’s properties.
- Next to DNS server assignment, click Edit.
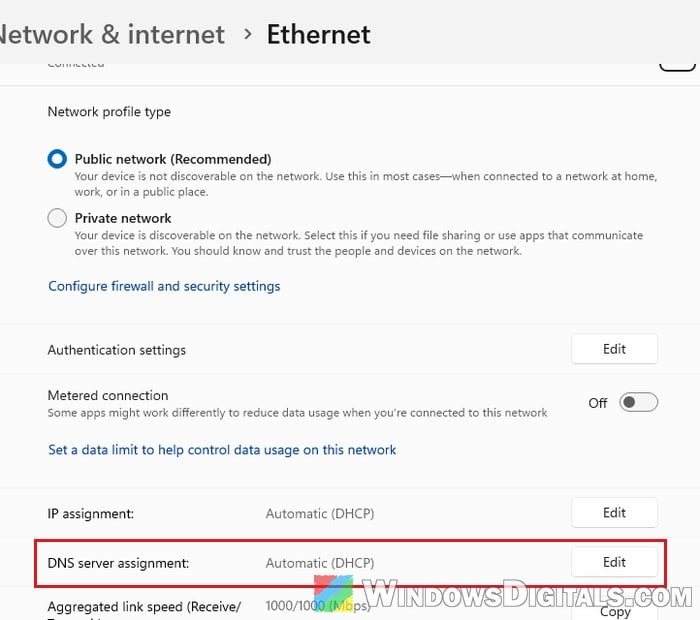
- In the Edit DNS settings box, select Manual and turn on IPv4.
- Enter 1.1.1.1 as the Preferred DNS and 1.0.0.1 as the Alternate DNS (Cloudflare), or 8.8.8.8 and 8.8.4.4 (Google).
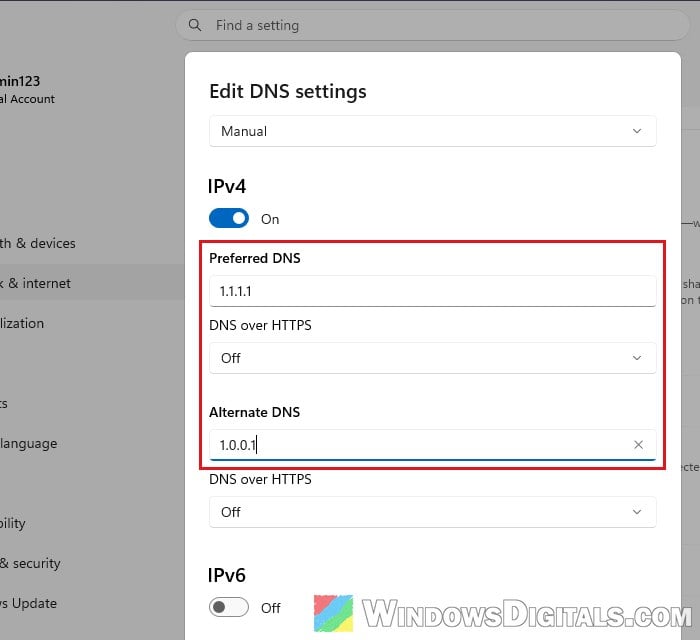
- Click Save.
Then restart Chrome and try the site again. If you’re on Windows 10, see: Change DNS to Google or Cloudflare in Windows 11/10.
Pro tip: DNS Servers to Unblock Websites and Possibly Everything
Reset your network settings
If nothing above helped, or you’ve changed network settings by hand before and aren’t sure what you changed, reset Windows’ network settings back to default.
Start with these commands:
- Open Command Prompt as administrator.
- Type the following commands one by one, and press Enter after each:
netsh winsock reset
netsh int ip reset
ipconfig /release
ipconfig /renew
ipconfig /flushdns
- Restart your PC.
If the error is still there, use Network reset:
- Go to Settings > Network & internet > Advanced network settings > Network reset.
- Click Reset now, then Yes to confirm.
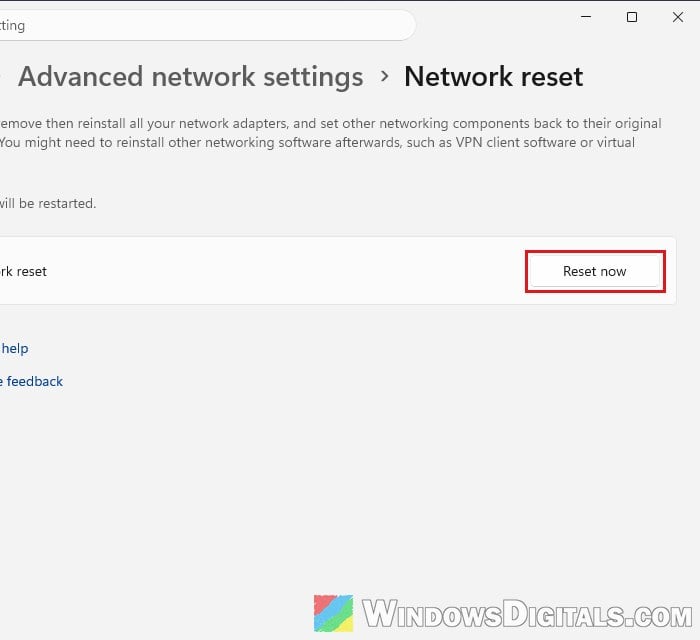
- Let your PC restart.
Please note that Network reset removes and reinstalls all your network adapters with default settings, which also clears DNS servers you’ve set by hand. Afterwards, you may have to reinstall VPN software, and your network may be set to Public.