When you try to turn on Virtual Machine Platform in Windows 11 for WSL 2, Docker Desktop or an Android emulator, it sometimes gets stuck on “Downloading required files”, fails with an error, or restarts only to show “We couldn’t complete the features. Undoing changes“. This guide will show you what usually stops the feature from turning on and how to get it working.
Also see: Turn Windows Features On or Off: “Please wait…”
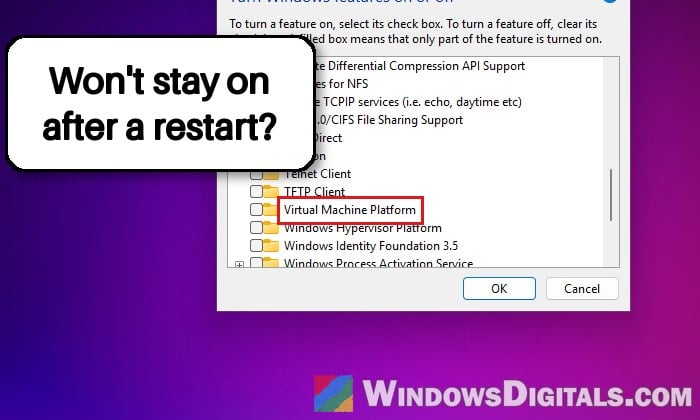
Why won’t Virtual Machine Platform turn on?
Virtual Machine Platform is the part of Windows that lets apps like WSL 2 run a small virtual machine in the background. It won’t install, or it rolls back after the restart, if any of the following is wrong:
- CPU virtualization is turned off in your PC’s UEFI (BIOS) settings.
- The hypervisor is disabled in Windows’ boot settings.
- Windows can’t get the feature’s files. Optional features download their files through Windows Update, so a broken Windows Update or damaged system files can stop it. That’s when you see “Windows couldn’t find required files to complete the requested changes“.
- Old virtualization apps, or an old driver, get in the way, such as an outdated VMware or VirtualBox, or a driver that isn’t compatible with Windows 11.
When it fails, apps that need it show their own error too, like WSL’s “0x80370102 The virtual machine could not be started because a required feature is not installed“.
Learn more: This host supports Intel VT-x, but Intel VT-x is disabled
Make sure virtualization is on in the BIOS
According to Microsoft, Virtual Machine Platform needs your CPU’s virtualization feature to be turned on in the UEFI (BIOS). It’s often on already (Surface devices come with it on), so check first.
First, check whether it’s on:
- Press Ctrl + Shift + Esc to open Task Manager.
- Go to Performance and select CPU.
- Look at Virtualization in the details below the graph. If it says Enabled, skip to the next section.
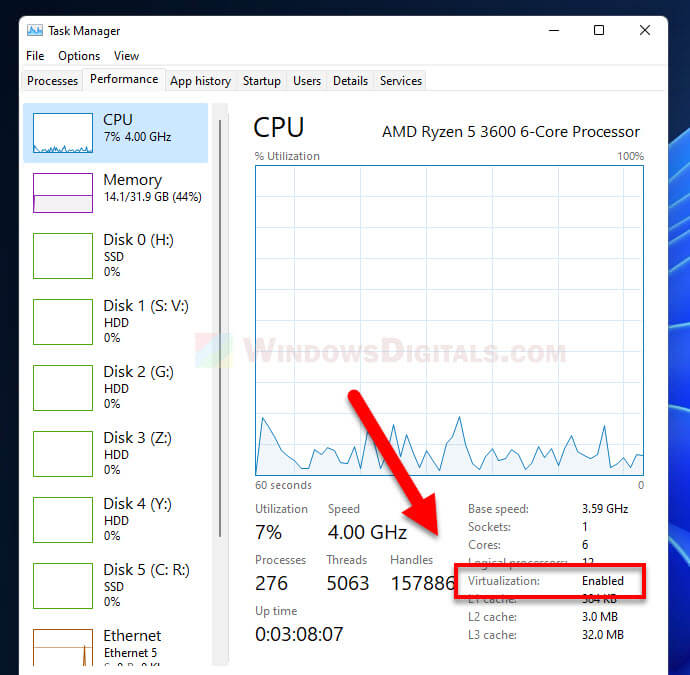
If it says Disabled, you’ll need to turn it on in the UEFI settings. Please be warned that Microsoft advises changing only that setting and leaving the rest as they are. If you’re not sure what you’re doing, it’s better to get someone to help you instead.
Here’s how to get there:
- Press Win + I and go to System > Recovery.
- Next to Advanced startup, click Restart now.
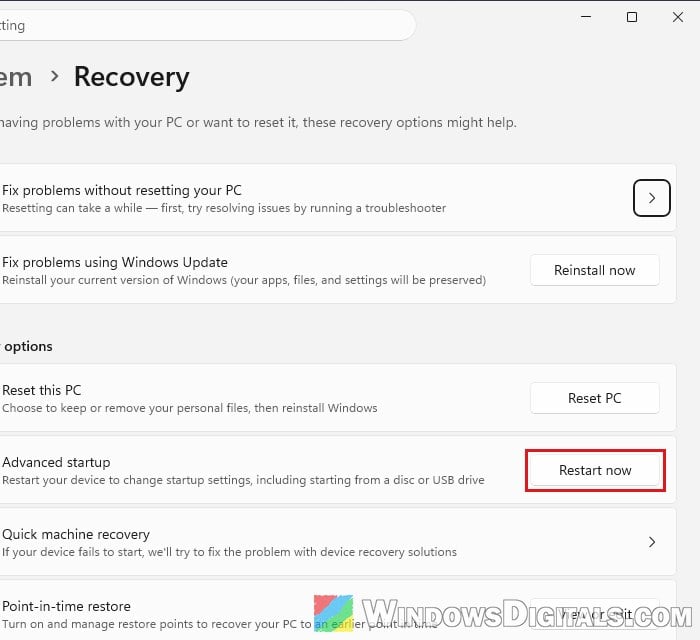
- Select Troubleshoot > Advanced options > UEFI Firmware Settings, then click Restart.
- In the UEFI, look for the virtualization setting. Where it is depends on your PC’s maker. It’s usually called Intel Virtualization Technology (or VT-x) on Intel PCs, and SVM Mode (or AMD-V) on AMD PCs. Set it to Enabled.
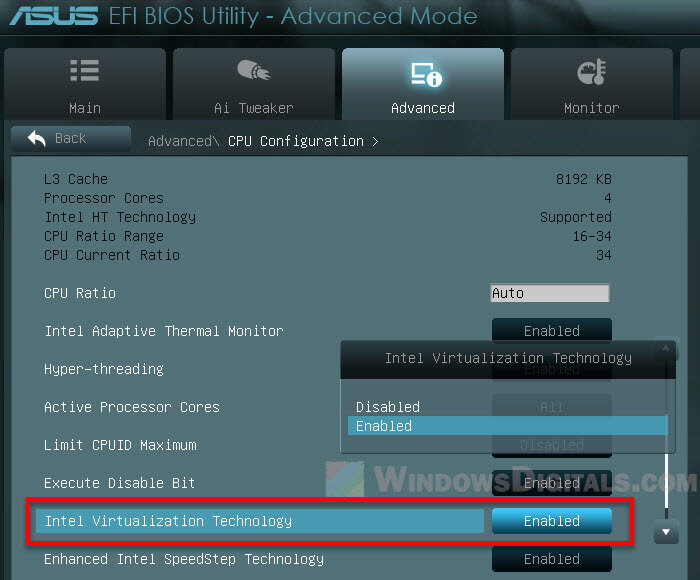
- Save the change and exit the UEFI.
Once Windows starts again, check Task Manager to see if Virtualization now says Enabled.
Turn the feature on another way, then restart
There’s more than one way to turn the feature on, and when one fails, another sometimes works. Microsoft says the feature only works after a restart, so don’t test WSL or your app before you’ve restarted.
On Windows 11 build 26100.7309 or 26200.7309 and later, you can turn it on from Settings:
- Press Win + I and go to System > Advanced > Virtual Workspaces.
- Turn on Virtual Machine Platform, then restart your PC.
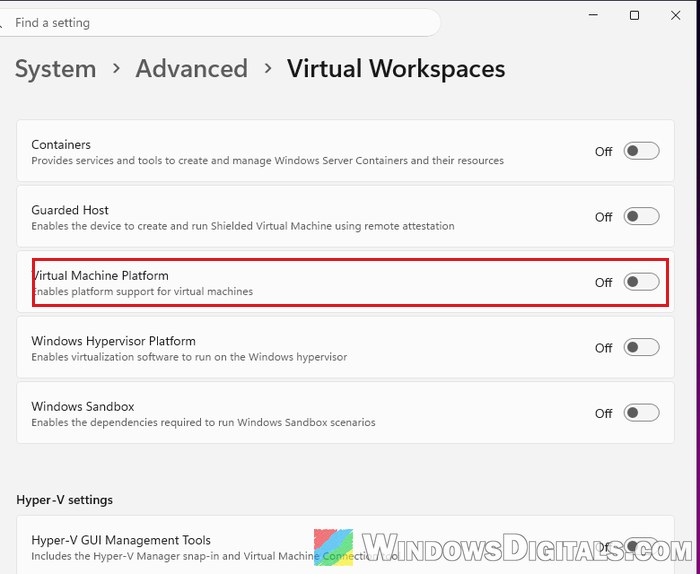
If you don’t have that page, use Windows Features:
- Press Win + R, type “optionalfeatures” and press Enter.
- Tick Virtual Machine Platform and click OK.
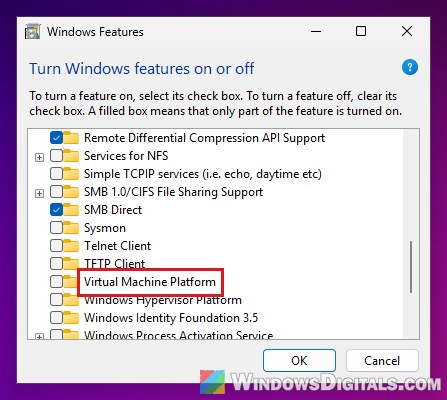
- Restart your PC when Windows asks.
If both fail, run the command Microsoft gives for it:
- Right-click Start and select Terminal (Admin), then click Yes.
- Type the following command and press Enter:
dism.exe /online /enable-feature /featurename:VirtualMachinePlatform /all /norestart
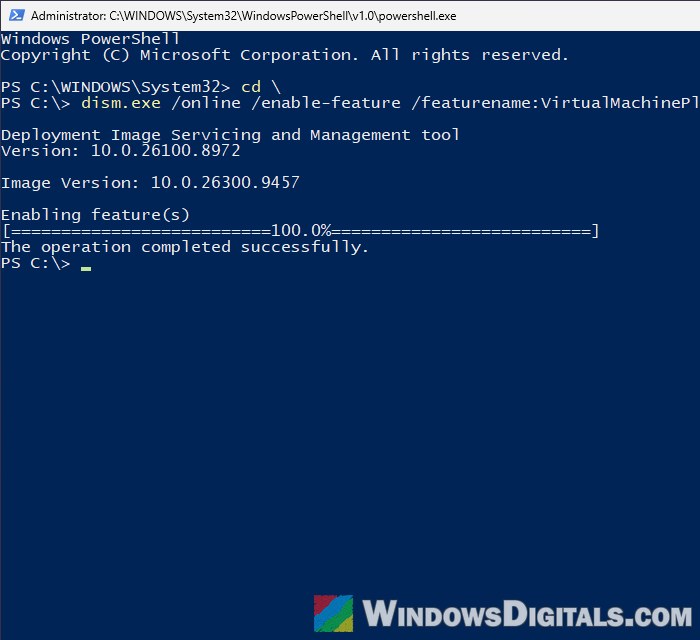
- When it says “The operation completed successfully“, restart your PC.
If the command says “The source files could not be found” instead, Windows can’t get the feature’s files, so go to the Windows Update section below.
Related guide: How to Start, Restart or Shutdown WSL2 on Windows 11
Make sure the hypervisor is set to start
Even with the feature installed, Windows won’t use it if the hypervisor is switched off in the boot settings. Microsoft lists this as one of the things to check when WSL 2 says the feature isn’t installed.
Follow the steps below:
- Open Terminal (Admin) again.
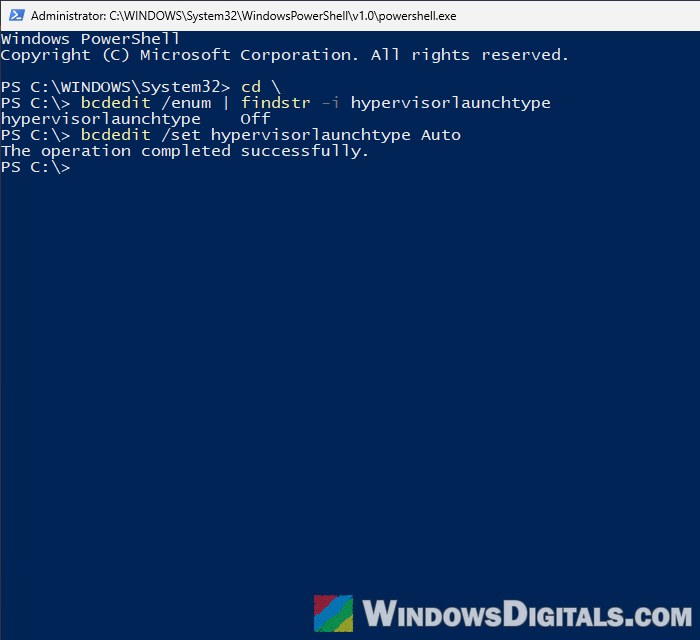
- Run this command to see the current setting:
bcdedit /enum | findstr -i hypervisorlaunchtype
- If it shows
hypervisorlaunchtype Off, turn it back on with this command:bcdedit /set hypervisorlaunchtype Auto
- Restart your PC.
After the restart, try turning on Virtual Machine Platform again, or open the app that needed it.
Update or remove other virtual machine apps
If you have VMware or VirtualBox installed, Microsoft says they need to be new enough to work alongside Hyper-V (VMware Workstation 15.5.5 or later, VirtualBox 6 or later), or be turned off. Update them to the latest version, or uninstall them for now, then try turning on Virtual Machine Platform again. It doesn’t fix it for everyone, but it’s quick to rule out.
Fix Windows Update and repair system files
If the feature gets stuck on “Downloading required files” or Windows says it couldn’t find the files it needs, the problem is usually on the Windows Update side. Windows downloads the feature’s files through it, sometimes even when Windows Update itself says you’re up to date.
Make sure Windows Update can actually install updates first, and install any updates that are pending. If Windows Update itself is stuck, restarting the Windows Update service is a good place to start. Then repair Windows’ system files:
- Open Terminal (Admin).
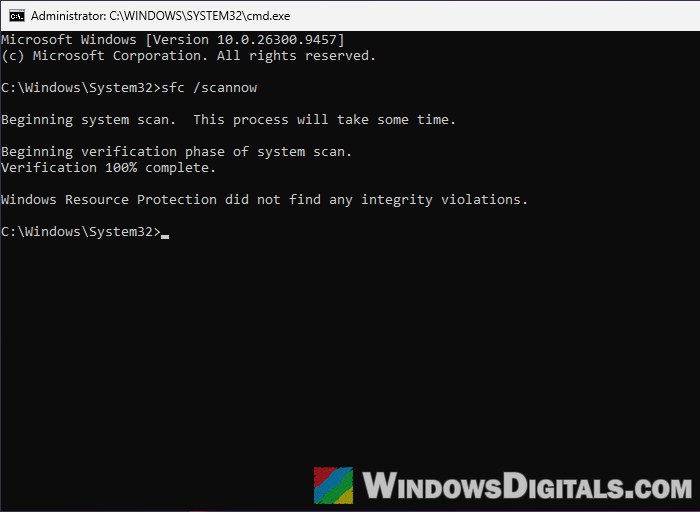
- Type the following command and press Enter:
sfc /scannow
- When it’s done, run this command:
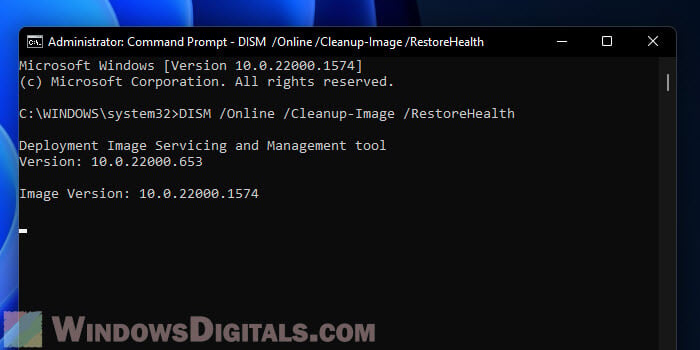
dism /online /cleanup-image /restorehealth
- Restart your PC and try turning on Virtual Machine Platform again.
Linked issue: DISM Error 0x800f0915 “The repair content could not be found anywhere”
Look for an old driver that breaks the restart
If the PC gets stuck in a restart loop after you turn on the feature, and Windows only rolls it back from Safe Mode or Startup Repair, an old driver could be the reason. In one case, it was a DVD burning driver from a very old copy of Photoshop Elements that isn’t compatible with Windows 11. Once it was disabled, Virtual Machine Platform installed without a problem.
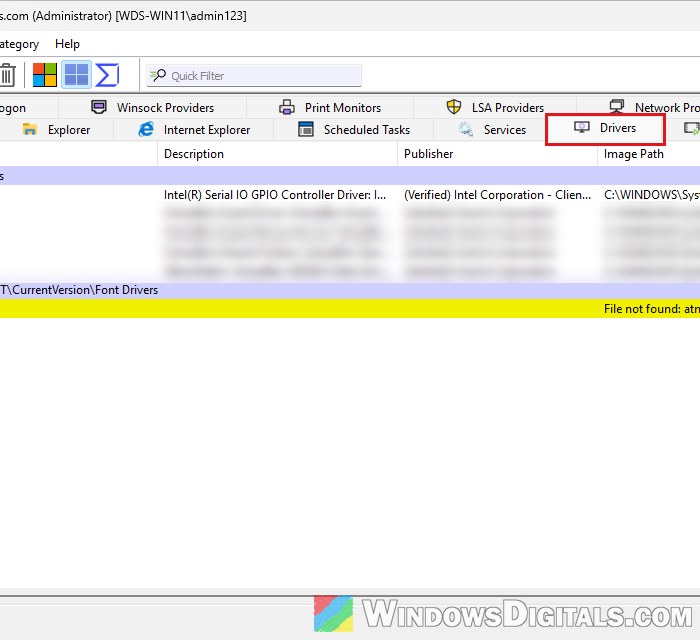
Microsoft’s free Autoruns tool lets you see and disable drivers that load with Windows:
- Download Autoruns from Microsoft’s Sysinternals page at
https://learn.microsoft.com/sysinternals/downloads/autoruns. - Extract the ZIP file, then right-click Autoruns and select Run as administrator.
- Go to the Drivers tab.
- Turning on Hide Microsoft Entries under Options makes the list much shorter.
- Look for old drivers from software you no longer use, such as disc burning tools.
- Untick the one you suspect.
- Restart your PC and try turning on the feature again.
If you’re not sure what a driver is, search its file name before you untick it.
Reinstall Windows with “Fix problems using Windows Update”
If nothing above works, Windows’ own files may be too damaged for the feature to install. The “Fix problems using Windows Update” option reinstalls your current version of Windows, and it keeps your files, apps and settings.
Here’s how to do it:
- Press Win + I and go to System > Recovery.
- Under “Fix problems using Windows Update“, click Reinstall now.
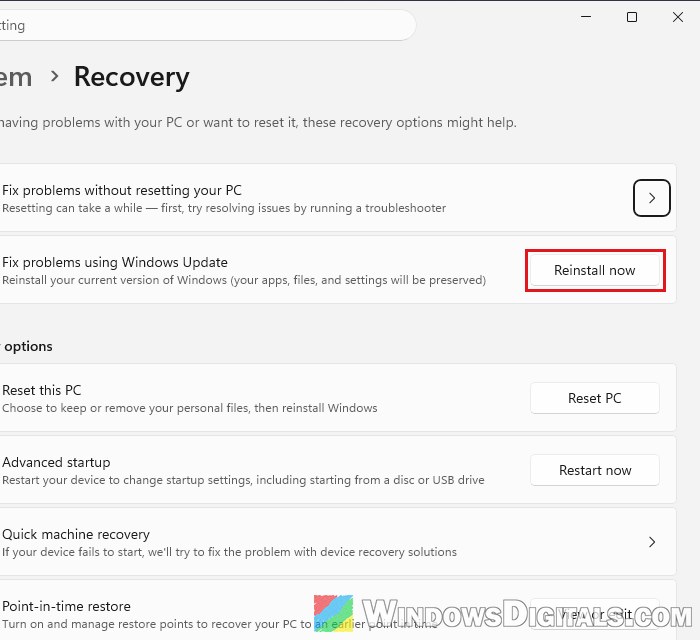
- Confirm, and let it download and install.
Suggested read: “Reinstall your current version of Windows” Message
Once Windows is back, turn on Virtual Machine Platform again using any of the methods above, then restart your PC.