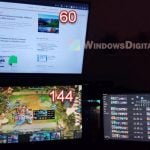
Is your 144Hz monitor only showing 60Hz in Windows 11? This common issue can prevent you from getting the most out of your high-refresh-rate monitor, which is really important for gaming and other graphic-heavy activities. Let’s quickly look into why this happens and how you can fix it to enjoy your monitor at the full 144Hz.
Also see: How to Change Desktop Screen Refresh Rate in Windows 11
Page Contents
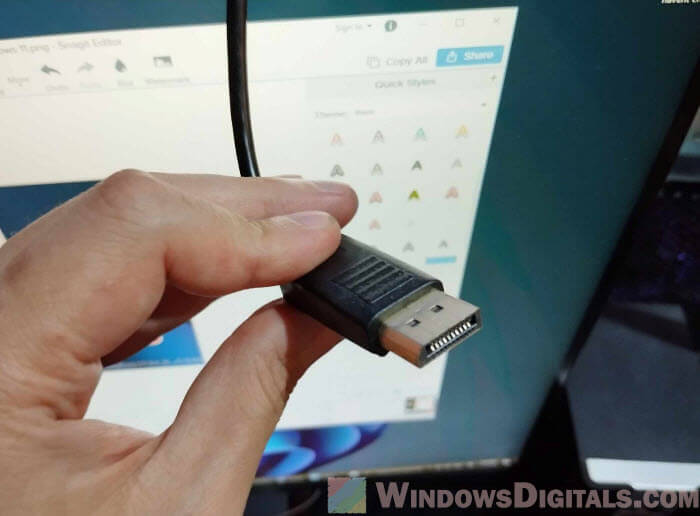
Cable compatibility and quality
Identify the right cable
One big reason your 144Hz monitor shows only 60Hz could be the cable you’re using. The kind of cable matters a lot because it affects the refresh rate your monitor can support.
- For most 144Hz monitors, a DisplayPort cable works best because it supports higher refresh rates and resolutions.
- Make sure your HDMI cable is version 2.0 or newer. Older versions may not handle higher refresh rates.
- If you’re using a DVI cable, it needs to be a Dual-Link DVI cable because a Single-Link can’t handle 144Hz.
Cable quality matters
Not all cables are the same. Even if you use the right type, a low-quality cable might not carry enough data for 144Hz. Try getting a cable from a trusted maker and check if it has ratings or certifications for handling high data rates.
Linked issue: Mouse Lag on 4k Monitor or TV Screen (Fix)
Graphics driver and settings optimization
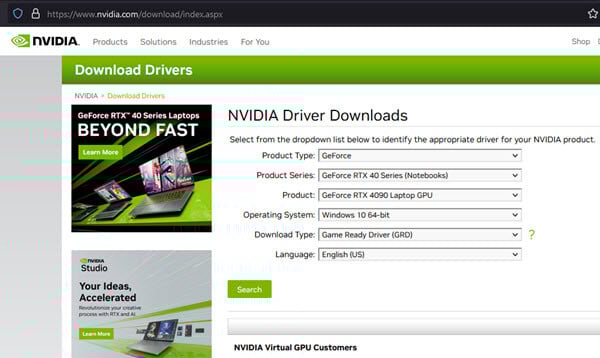
Update graphics drivers
Out-of-date or wrongly installed graphics drivers often cause refresh rate problems. For the best performance:
- Keep your graphics driver updated by visiting the manufacturer’s site, like NVIDIA, AMD, or Intel. Don’t just rely on Windows Update.
- Sometimes, starting fresh with a clean installation of the graphics driver can fix problems. This removes old settings and puts in the newest driver.
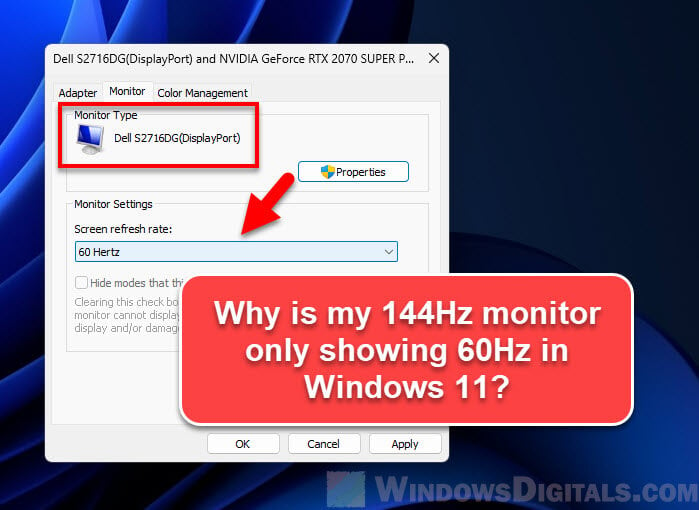
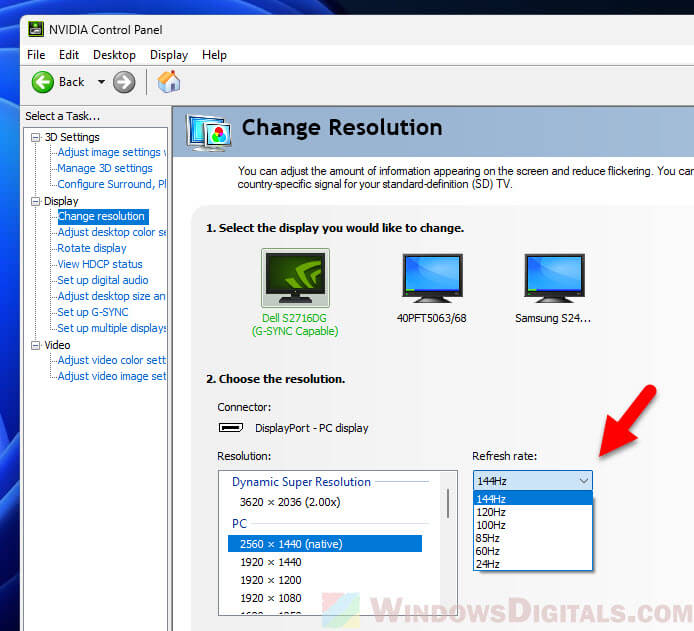
Configure graphics settings (Refresh Rate)
Adjusting your graphics control panel settings can also affect your monitor’s refresh rate.
- If you have an NVIDIA card, go to the NVIDIA Control Panel and adjust the monitor settings under “Change resolution”. Make sure you choose the highest available refresh rate.
- For AMD users, similar settings are available in the AMD Radeon Software under ‘Display’ settings.
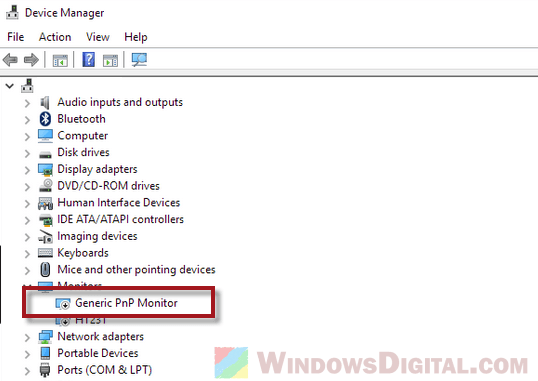
Monitor detection
Make sure your operating system correctly recognizes your monitor. Sometimes a monitor is just seen as a ‘Generic PnP Monitor’ in the Device Manager, which can limit its features. Update the monitor driver or choose the right monitor model manually to get higher refresh rates.
Learn more: Generic PnP Monitor Windows 11/10 Driver Download Problem
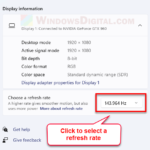
Adjust some Windows display settings
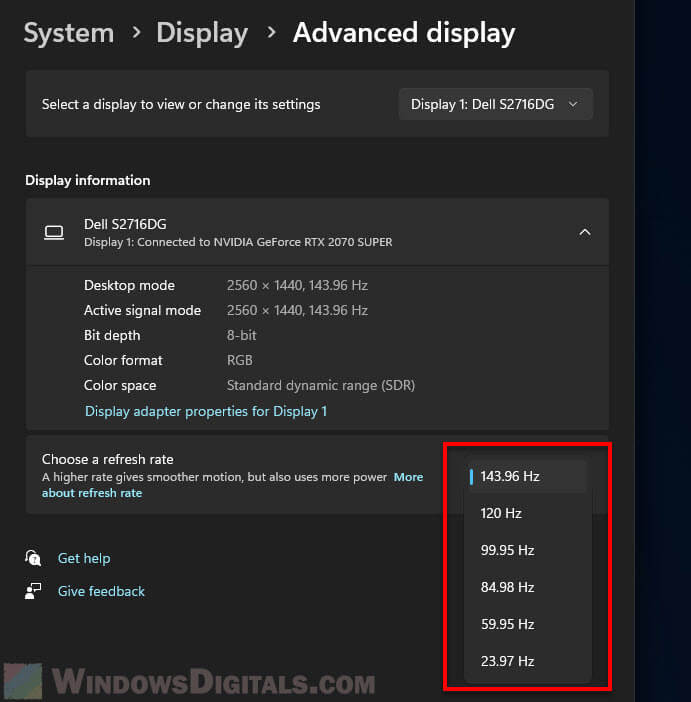
Access advanced display settings
Sometimes adjusting Windows 11 display settings can solve the problem:
- Go to Settings > System > Display.
- Select Advanced display settings for the display you are working on.
- Look for a dropdown menu that lets you change the refresh rate. Make sure 144Hz is chosen if it’s available.
Multi-monitor concerns
If you use more than one monitor, how they’re set up can affect the refresh rate. Sometimes having different refresh rates on each monitor can cause the faster one to only use the slower rate. Try unplugging the second monitor or matching their refresh rates to see if that helps.
Related resource: Game Stuttering and Lag on Dual Monitor (Fix)
Monitor settings and overclocking
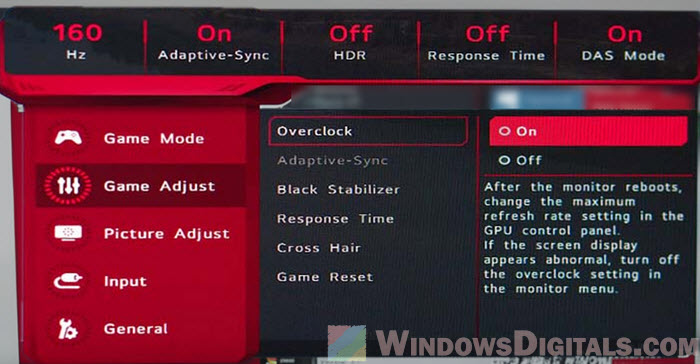
Adjust monitor On-Screen Display (OSD) settings
The settings on the monitor itself can also affect the refresh rate:
- Go into the monitor’s OSD (On-Screen Display) menu.
- Look for options that have to do with refresh rate or display settings.
- Some monitors have an Overclock (OC) mode which lets them go to higher refresh rates. Turn this on if your monitor supports it.
Firmware and compatibility
- Check if there are firmware updates for your monitor. Sometimes, these can enhance performance or fix issues.
- Make sure your monitor really supports 144Hz natively. Some displays might need specific settings or conditions to achieve higher refresh rates.
Similar problem: Why is My 240Hz Monitor Only Showing 144Hz?
Custom resolution and refresh rate
Create a custom resolution
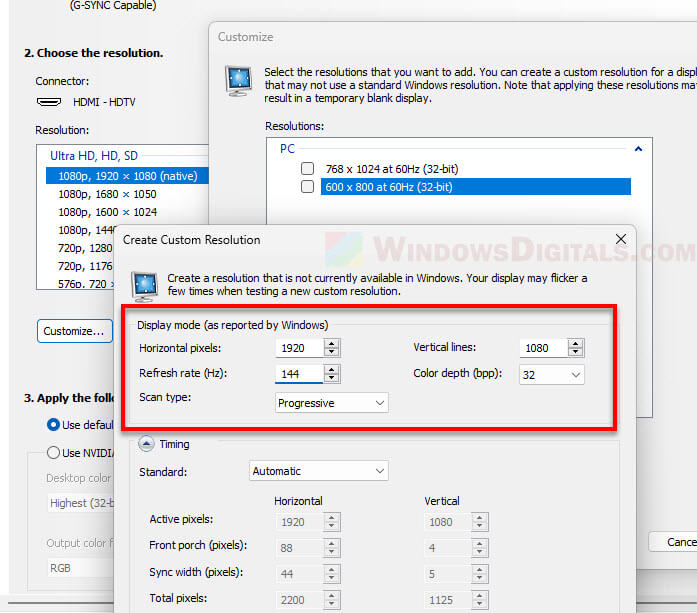
If usual methods don’t work, try creating a custom resolution:
- Open the control panel for your graphics card (NVIDIA Control Panel or AMD Radeon Settings).
- Find the display settings and look for an option to create a custom resolution.
- Manually enter your monitor’s native resolution and set the refresh rate to 144Hz.
- Be careful with this; wrong settings can cause display problems. If the “Customize” button is greyed out, see: NVIDIA Control Panel Custom Resolution Greyed Out.
Recommended read: 16:10 vs 16:9 Aspect Ratio for Gaming: Which is Better?
Test and apply changes
- Use the “Test” feature after setting up a custom resolution to make sure the display works properly with these settings.
- If it works, apply the settings. If not, go back and adjust the values a bit.