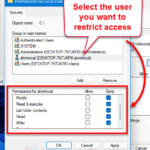
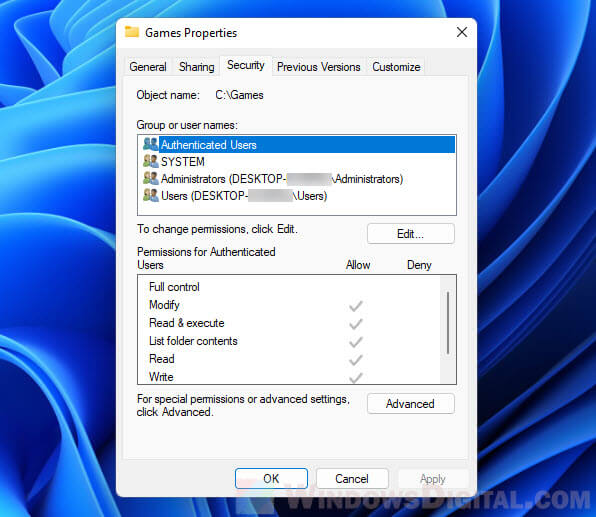
In Windows 11, when you open the Properties of a file, folder or drive, there is a tab called Security which displays the information about the permission settings of the file. The Security tab also allows you to configure various permission settings for different groups or users. By clicking the Edit or Advanced button, you will be able to change the permissions for each group or user name.
If you don’t see the Security tab in the Properties window for a file or folder and there is no other relevant tab that allows you to configure the permissions of the file or folder, read on to learn how to fix the issue and bring back the missing Security tab in the Properties window in Windows 11.
Also see: How to Take Ownership of a File, Folder or Drive in Windows 11
Page Contents
Fix: Security tab missing from File Properties in Windows 11
In Windows 11, you are allowed to disable the Security tab of the properties window for any file or folder by editing a simple registry value. By default, the Security tab is set as enabled to allow users to easily control user’s access to files and folders.
However, some users prefer to have it disabled so that other users (e.g. their children) who use the same computer cannot configure the permission of any file or folder.
If the Security tab was disabled previously, it will not show up as a tab in the Properties window of any file, folder or drive when you right-click it and select Properties. To bring the Security tab back to the Properties window, you need to re-enable the Security Tab in Windows 11. This can be easily done by editing (or adding) a simple registry value via Registry Editor.
Related: How to Restrict User Access to a Folder or Drive in Windows 11
Enable Security Tab in Windows 11
Using Registry Editor
To enable Security tab in file Properties on Windows 11, follow the steps below.
Caution: This instruction involves registry editing. Editing registry in Windows can cause serious issue and may potentially corrupt your operating system if done incorrectly. Therefore, it’s recommended that you create a system restore point or make a full backup of your Registry before making any changes. Please proceed at your own risk.
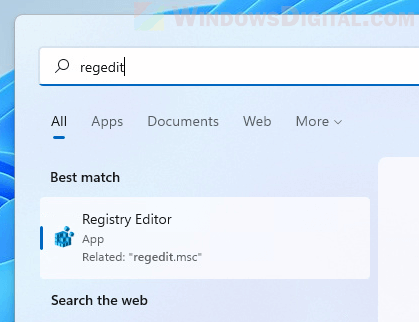
- Search for “Registry Editor” via Start and open it.
- Next, copy and paste the following path to the address bar in the Registry Editor window.
HKEY_CURRENT_USER\Software\Microsoft\Windows\CurrentVersion\Policies\Explorer
- In the Explorer registry key, if you don’t see any registry value called “NoSecurityTab”, right-click anywhere in the right pane and select New > DWORD (32-bit) Value.
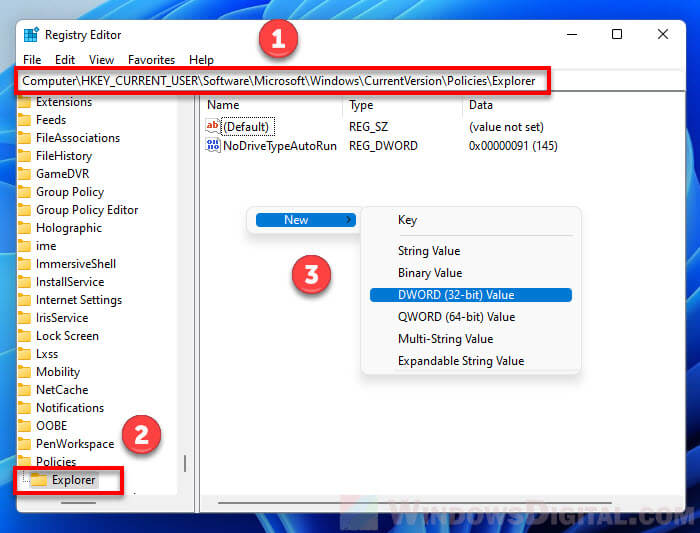
- Rename the newly created DWORD value as
NoSecurityTab.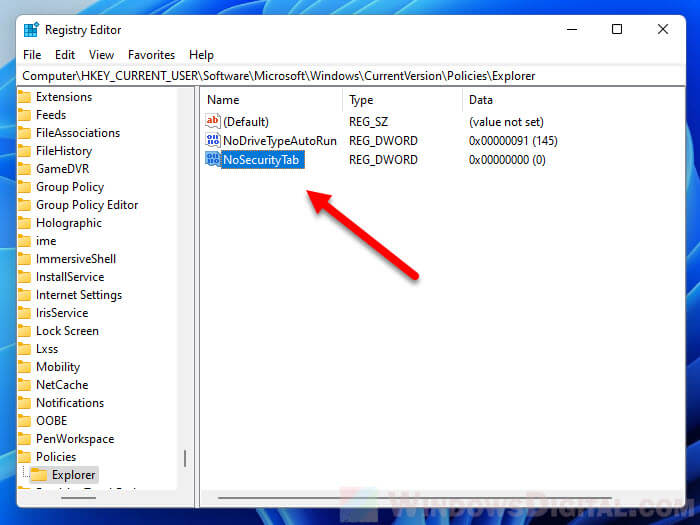
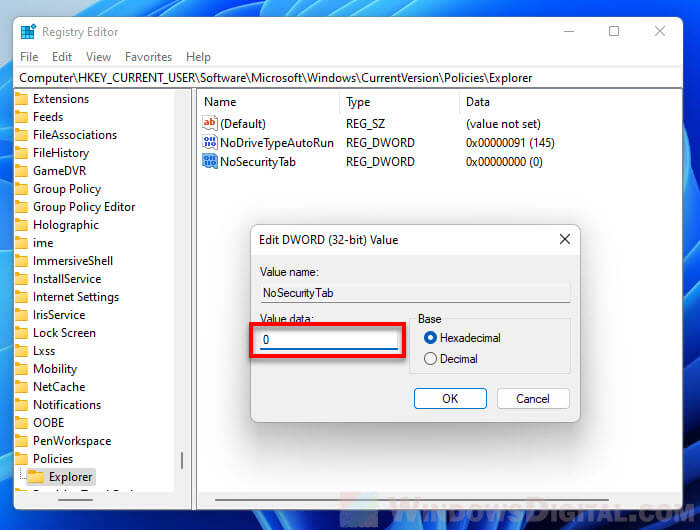
- Next, double-click the “NoSecurityTab” value and change the “Value data” field to “0“. This will tell Windows to ignore the “No Security Tab” setting and enable the Security tab in the Properties.
- Restart your computer for changes to take effect.
On the contrary, if you want to disable the Security tab, change the “NoSecurityTab” value data to “1“. This will tell Windows to respect the setting and disable Security tab in file and folder Properties.
Read next: How to Lock Drive in Windows 11
Using Group Policy Editor
If you are using Windows 11 Pro edition or higher, you can use the local group policy editor instead to enable the Security tab in file properties. Here’s how to do it.
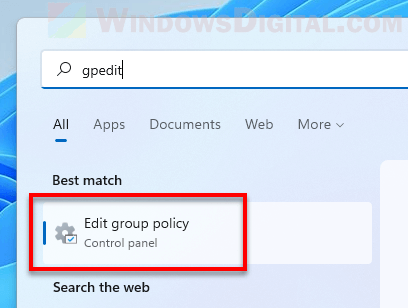
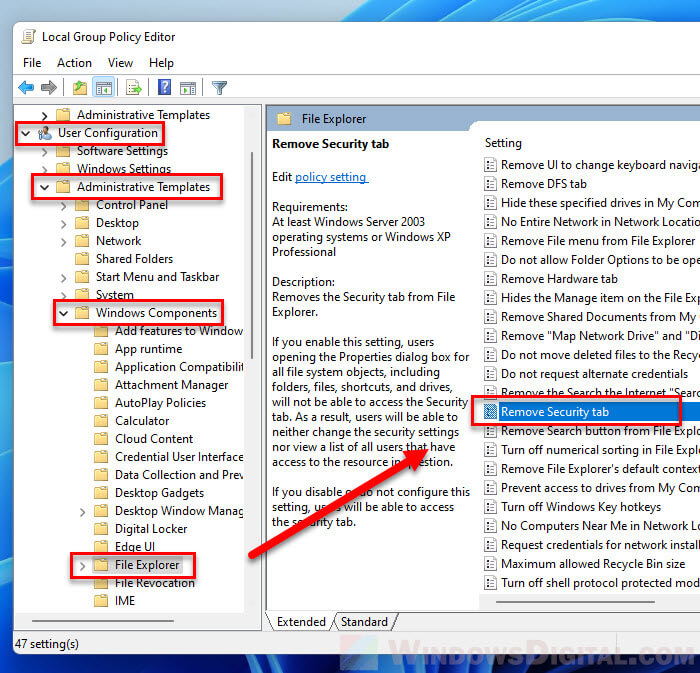
- Go to Start menu and type “gpedit”. Select Edit Group Policy to open it.
- In the Local Group Policy Editor window, on the left pane, navigate to the following policy.
User Configuration > Administrative Templates > Windows Components > File Explorer
- Next, double-click the policy called “Remove Security tab” from the right pane.
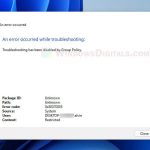
- In the Remove Security tab policy setting window, select Disable to disable the policy. As this setting controls if the Security tab can appear in the Properties dialog or not, if you disable this setting, Windows will show the Security tab in the Properties window for all files, folders, shortcuts and drives.
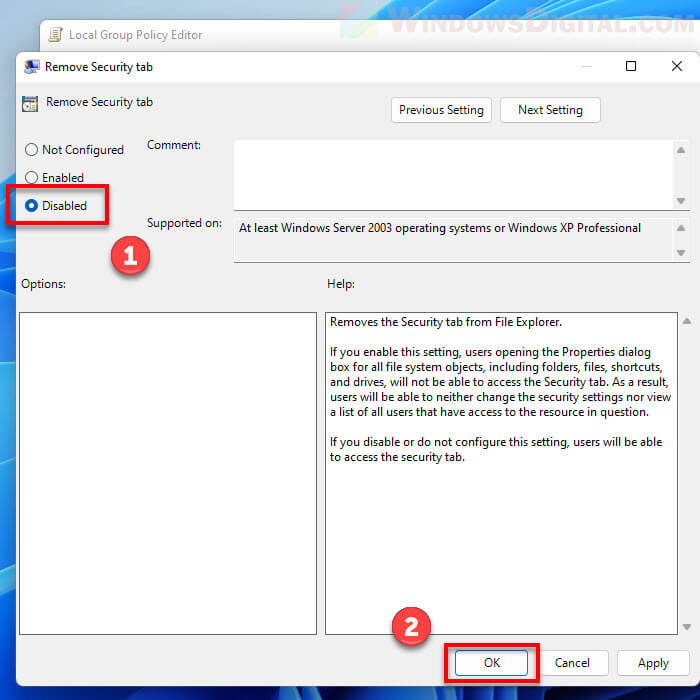
- Restart your PC for changes to take effect. Retry opening the Properties of any file or folder. You should be able to see the Security tab now.
Conversely, if you would like to remove the Security tab from the Properties dialog for all files and folders, repeat the steps above and enable the “Remove Security Tab” setting.
Frequently Asked Questions
The Security Tab can be found in the Properties dialog of a file, folder, shortcut or drive. You can access the Properties dialog by right-clicking a file or folder and then select Properties.
To enable the Security tab in file and folder properties, you need to disable the “Remove Security tab” policy setting via Local Group Policy Editor, or edit the “NoSecurityTab” value via Registry Editor.
You can configure the permission of a file or folder via the Security tab in the properties window of the file or folder. You can access the Security tab by right-clicking the file or folder and select Properties. Next, click the Security tab and click the Edit or Advanced button to configure the permission of the selected file or folder.