System 32 is an extremely important folder that holds all sorts of files and folders that are vital to keep Windows working. In specific terms, it contains DLL (Dynamic Link Library) and executable files that your computer needs to operate. Aside from these, System 32 also contains driver files – the files that tell Windows how to work with various hardware.
Many who are not computer literate and don’t know about System32 folder may see it as a virus. Although it is possible to have a virus infected file sitting inside the System32 folder, the System32 folder itself is certainly not a malicious folder. It is a core folder required for Windows to work.
Also see: How to Force Delete a File in Use by Another Program on Windows 11
Page Contents
What happens if you delete System 32?
The answer is pretty simple – If you delete one or more core files or the entire System 32 folder, your Windows OS will crash (causing BSOD, system failure and instability, etc.), and in most cases, you will not be able to boot into your Windows again.
That is why most files in the System 32 folder and the folder itself are protected by TrustedInstaller to prevent users from accidentally modifying or deleting them.
Related: How to Delete a Ghost File or Folder in Windows 11/10
How to delete a file in the System32 folder?
If you suspect a file sitting in the System32 folder to be possibly a virus or malware, you should first try to scan the entire System32 folder with your antivirus program. If you are certain that a file in the System32 folder is malicious and that you are sure it is not one of the Windows core system files, you can manually delete the file by following the steps below.
Since most files in the System 32 folder are protected by TrustedInstaller, when you forcefully delete such files, you will receive an error that says “You need permission to perform this action – You require permission from TrustedInstaller to make changes to this file“.
Thus, we will need to take ownership of the file from TrustedInstaller, and then edit the permission of the file so that you are allowed to delete it. The steps below will show you how to do so in Windows 11 (also applicable to Windows 10). Warning: Deleting a core system file can cause serious issues in Windows such as system instability, crashes and system failure. Please proceed at your own risk.
See also: How to Take Ownership of a File, Folder or Drive in Windows 11
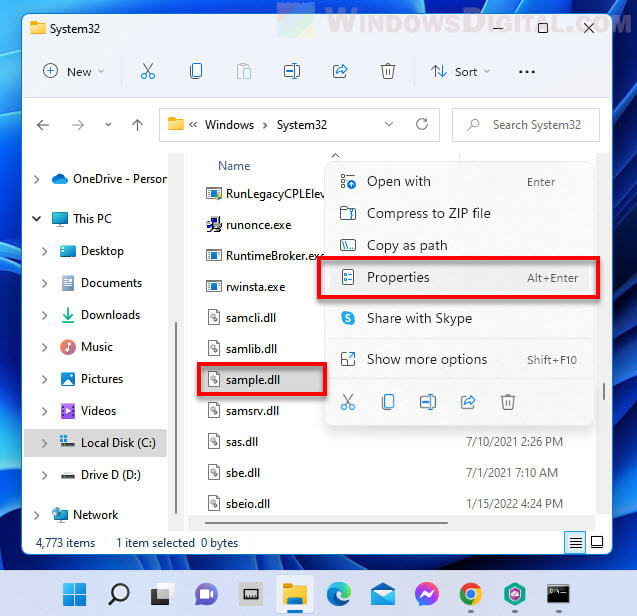
1. In the System32 folder, right-click the file you want to delete, then select Properties.
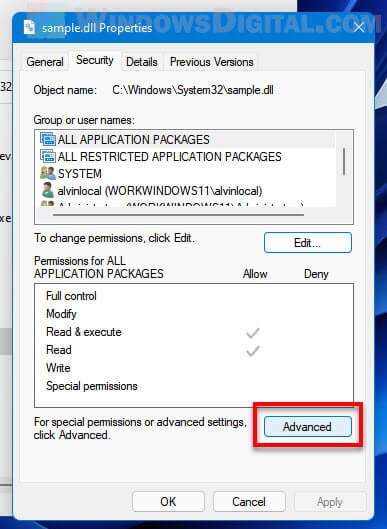
2. Next, click Advanced in the Properties window.
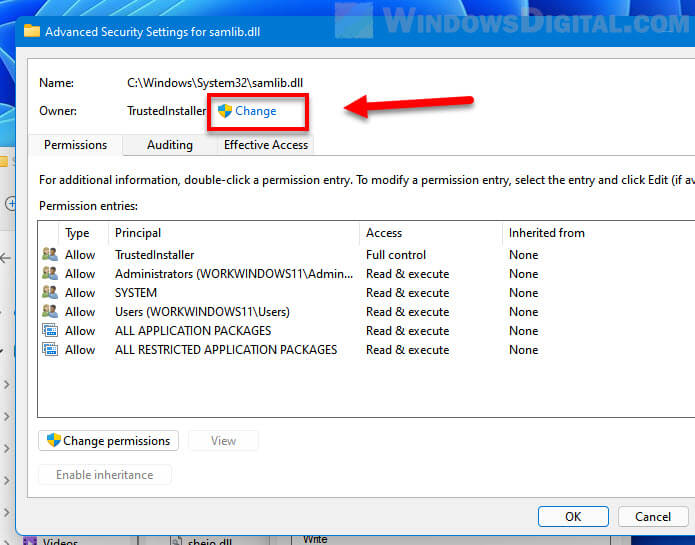
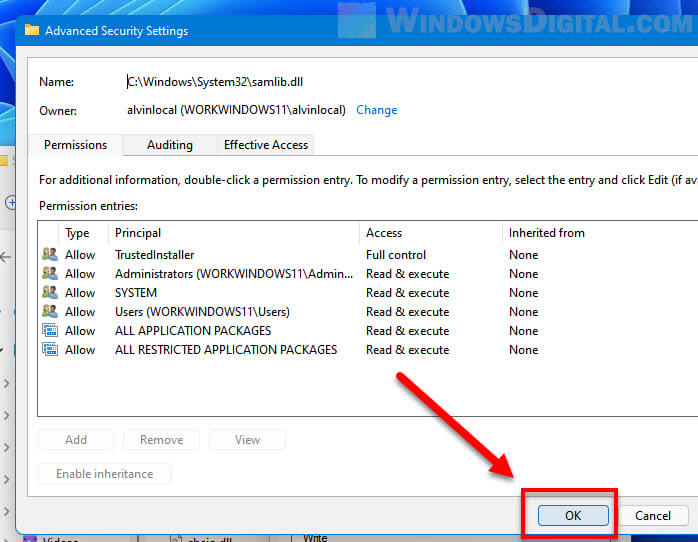
3. In the Advanced Security Settings window, click Change next to the Owner (TrustedInstaller). Note that this action requires administrative privileges. You need to sign in to an administrator user account in order to do so.
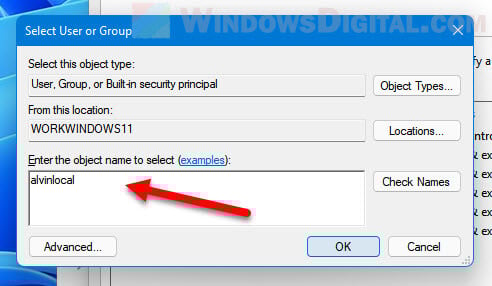
4. In the “Enter the object name to select” field, enter the username of your current user account. If your user account is a Microsoft account, enter the email address of your Microsoft account, for example, [email protected]. Then, click OK to continue.
5. In the Advanced Security Settings window, click OK to save the changes.
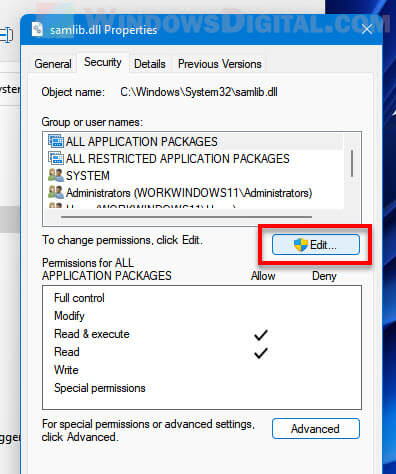
6. Back to the File Properties window, click Edit next to “To change permissions, click Edit”.
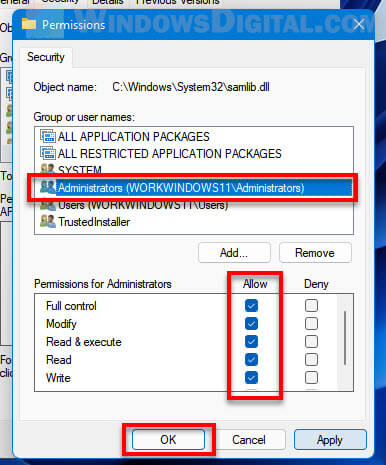
7. In the permission window, select Administrators, then enable the checkbox for Full control under Allow column. Click OK to save the changes.
8. You can now try to delete the file in the System 32 folder. You should be able to delete it now.
How to delete System 32 folder of an old Windows?
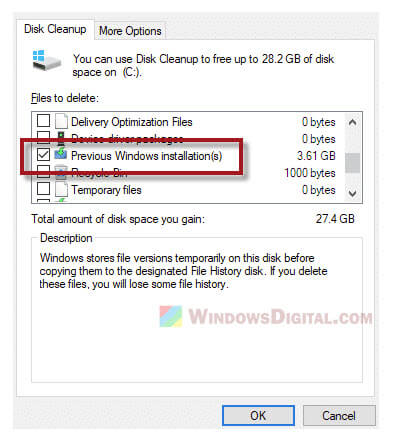
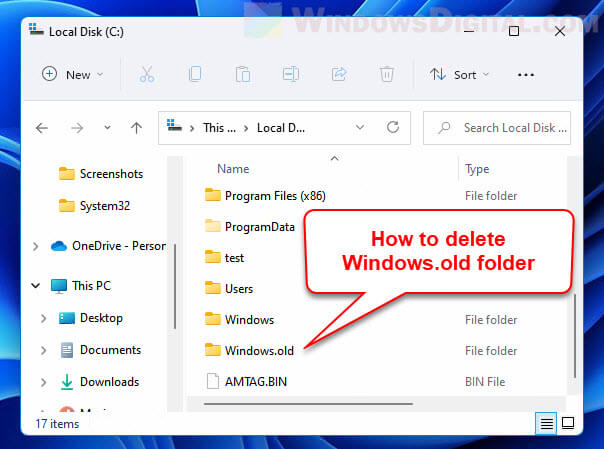
If you want to delete the System32 folder or the entire Windows folder of an old Windows you no longer need, you can do so using the Disk Cleanup tool in Windows 11. A Windows.old folder and all folders in it (including the System32 folder) are safe to delete since they are no longer in use. The screenshot below shows how a Windows.old folder looks like if you have a previous Windows installation.
Read: Delete Windows.old Folder in Windows 11/10 – Access Denied?
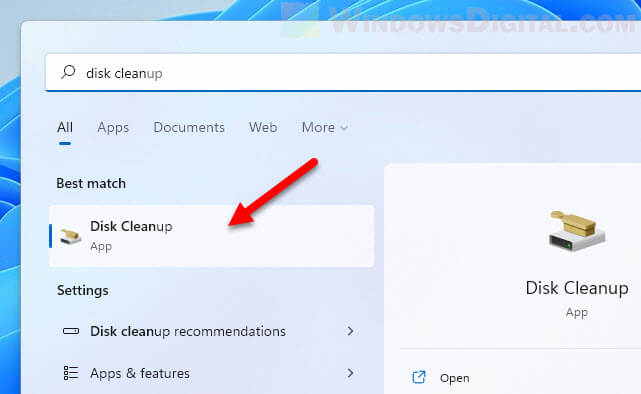
1. Search for “Disk Cleanup” via Start and open it.
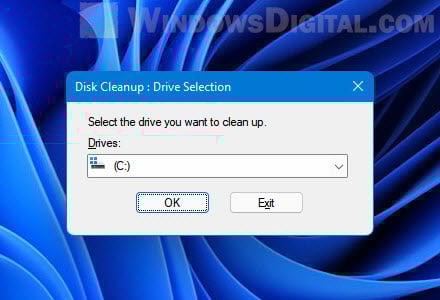
2. When asked to select a drive you want to clean up, select the drive where the Windows.old folder is located.
3. In the Disk Cleanup window, under “Files to delete”, select Previous Windows installation(s) and then click OK to continue. Windows 11 will then proceed to delete the previous Windows installation – the Windows.old folder.