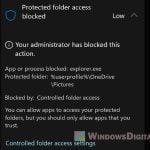
By default, Windows Defender’s Firewall blocks all apps and programs that require incoming or outgoing network connections in both Windows 10 and Windows 11. When you launch a new program for the first time, you will usually receive a notification from Windows Firewall that asks for permission if the program should be allowed to run.
If you have already set up all apps that you need and no longer want Windows Firewall to allow any more new apps to have access (send or receive data) to the internet, you can disable all firewall notifications using one of the methods provided below.
Also see: How to Disable Desktop Pop Up Notifications on Windows 11
Page Contents
Turn off firewall notifications in Windows 11/10 via Windows Security
The following guide assumes you are using Windows 10 or Windows 11 default Windows Defender’s Firewall. It won’t disable notifications brought up by any third-party firewall software. Follow the steps below to disable Windows Defender’s firewall notifications if you no longer want to allow any more new apps to have access to the internet.
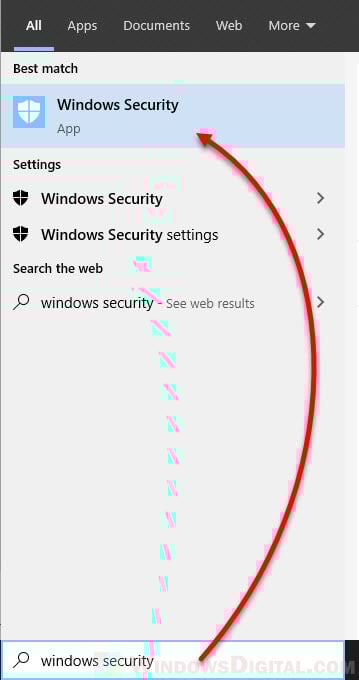
- Go to the Windows search bar and search for and open the Windows Security app.
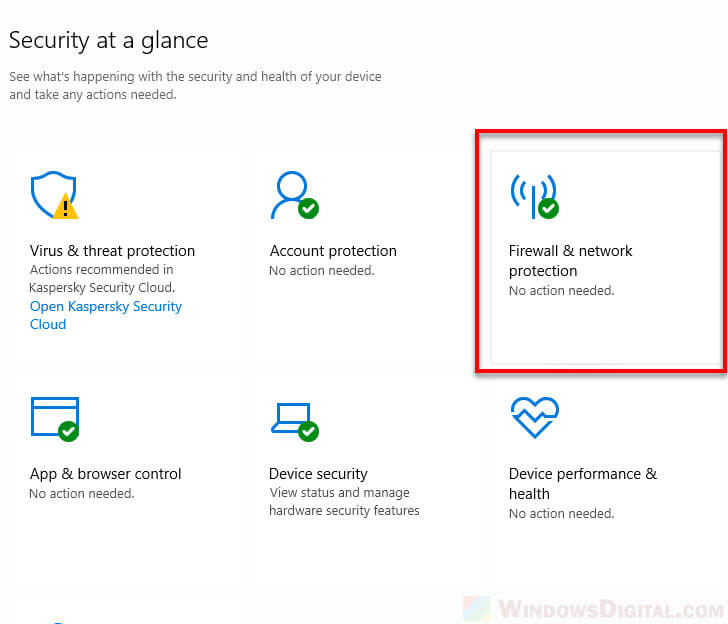
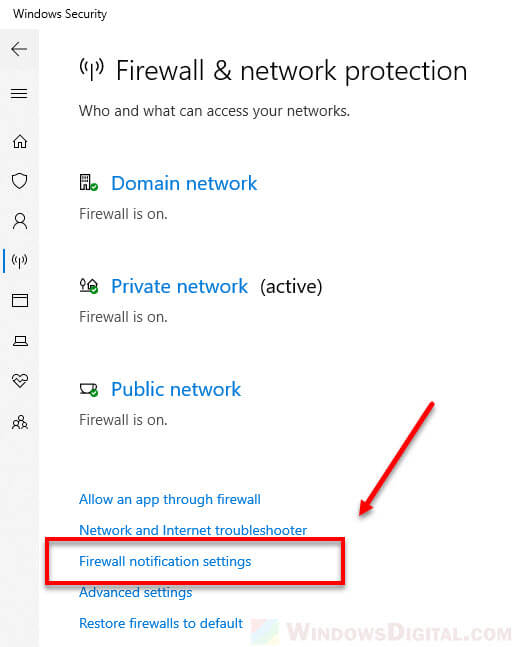
- In the Windows Security window, click on Firewall & network protection.
- In the next screen, click on Firewall notification settings.
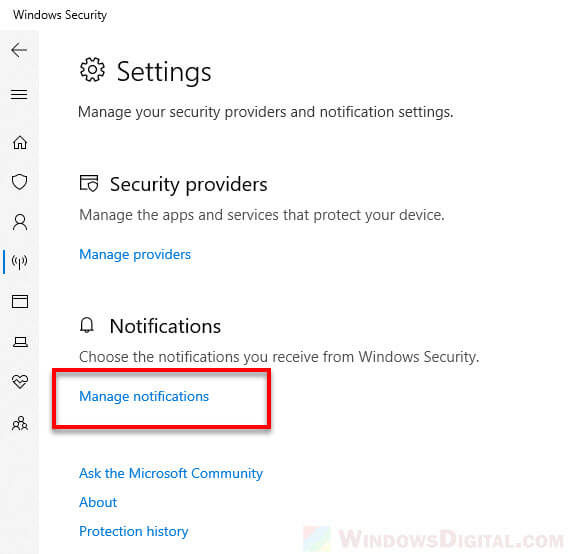
- Under Notifications settings, click on manage notifications.
- Here you can configure which notifications you want to stop Windows Security from sending to you and which to retain as it is. Under “Notify me when Windows Defender Firewall blocks a new app“, you can selectively disable firewall notifications from the domain, private or public network, or disable all notifications entirely by clicking on the toggle button to turn it off.
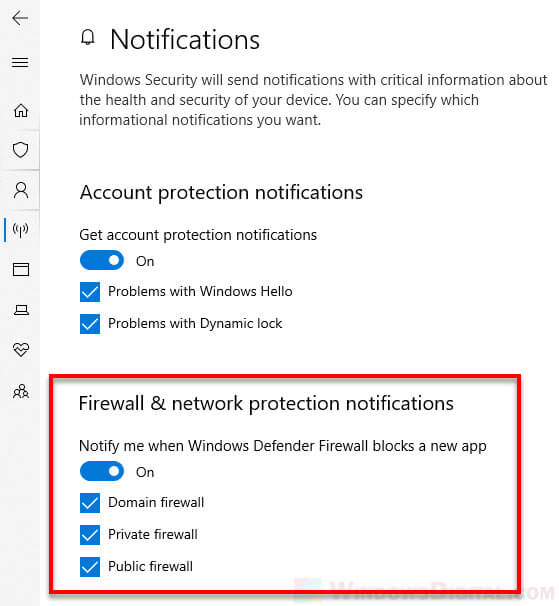
Disabling these options will only disable Windows Security from notifying you when it blocks an app or detects a problem. It won’t disable the Firewall. Windows Defender will still continue to protect your PC from incoming threats.
Suggested read: How to Allow an App Through Firewall in Windows 11
Disable firewall notifications via GPO
To disable firewall notifications in Windows 11 or 10 via Group Policy Object (GPO), follow the steps below.
- Open Group Policy Editor by typing “gpedit” in the Windows 10 or Windows 11 search bar or Cortana.
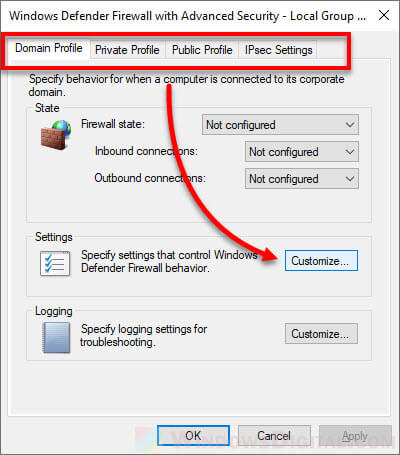
- In the group policy editor window, navigate to Computer Configuration > Windows Settings > Security Settings > Windows Defender Firewall with Advanced Security > Windows Defender Firewall with Advanced Security – Local Group Policy Object. In the right pane, click on “Windows Defender Firewall Properties“.
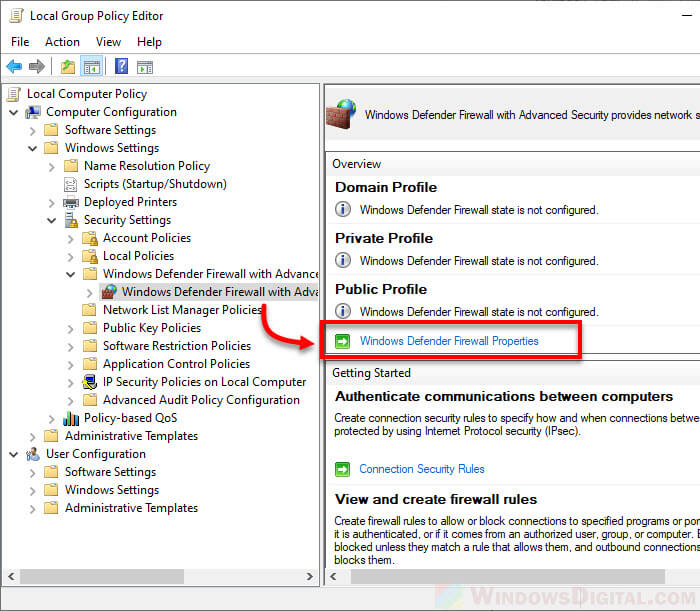
- Select a Firewall profile (repeat step 3 and step 4 if you want to disable all notifications from all firewall profiles), then click on Customize.
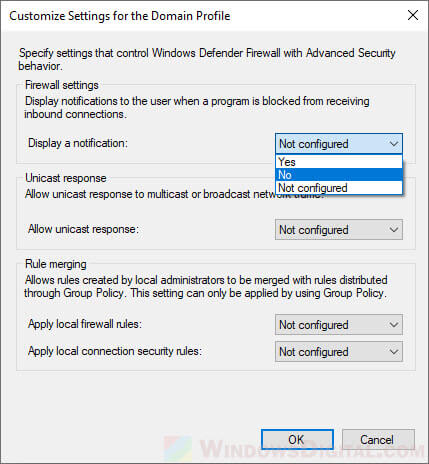
- Under Firewall settings and next to Display a notification option, select “No” to stop receiving notifications from this firewall profile.
Use command line
To quickly disable all Windows Defender’s firewall notifications for all profiles in Windows 10 or Windows 11, use the following command line in an administrator elevated command prompt or Windows PowerShell.
netsh firewall set notifications mode = disable profile = all
If you are using other third-party firewall software, to turn off the notifications of the firewall, you have to look for the relevant settings inside the firewall app itself. The firewall notifications settings in Windows Defender will not affect any third-party firewall program.
Why would you want to disable Windows Firewall notifications?
Having a firewall on your PC is very important because it helps keep unwanted access and dangerous network traffic away from your system. But sometimes, getting too many firewall notifications can become quite annoying, especially when you’re playing a full-screen game where the notifications kick you out of the game. If you feel confident about your computer’s security and the apps you’ve installed, you might want to turn off these notifications just to cut down on the interruptions.
Even if you decide to turn off the notifications, just know that your firewall is still up and running. Turning off its notifications doesn’t mean the protection is off.