In gaming, screen tearing has always been one of the biggest issues. It happens when a game produces more frames than your monitor can handle. For example, if your game runs more than 180 frames per second on a 144Hz refresh rate monitor, you will likely see screen tearing – a state of the display where you will see a distorted image for a split second.
To solve this issue, VSync was introduced. VSync, when enabled, will force synchronize your game’s frame rate with your monitor refresh rate, thus, eliminating the screen tearing issue. However, multiple new problems arise when VSync is in used. Users will very likely experience input lag/delay and screen stuttering when VSync is enabled. It was difficult to balance the good and bad of using VSync.
As a result, G-Sync was then introduced by NVIDIA to solve both the screen tearing and input lag issues. It is a new variable refresh rate technology that is able to synchronize game’s frame rate with monitor refresh rate while making sure the frames can appear instantly to minimize input lag and screen stuttering.
FreeSync is AMD’s version of G-Sync. They are both essentially the same – to allow your monitor to stay in sync with your game’s render rate to increase smoothness and reduce latency. G-Sync works only with NVIDIA graphics cards, while FreeSync is compatible only with AMD graphics card.
You will also need to have a G-Sync or FreeSync supported monitor in order to use the technology. For instance, if your monitor is not certified as G-Sync compatible, you will not be able to turn on G-Sync on your computer.
Page Contents
How to Enable NVIDIA G-Sync in Windows 11
To turn on NVIDIA G-Sync technology in Windows 11, follow the steps below.
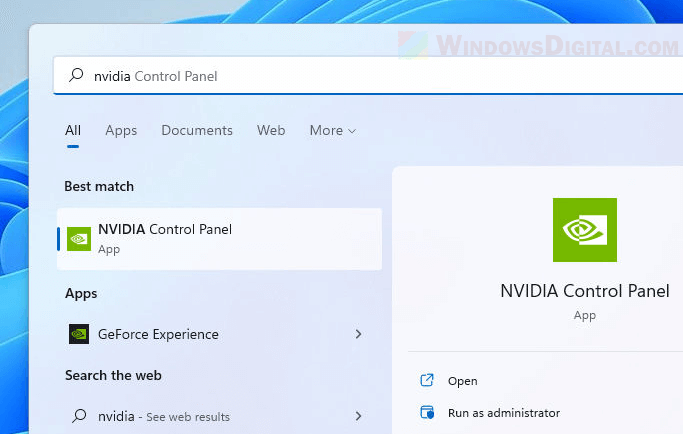
1. First, search for and open “NVIDIA Control Panel” via Start.
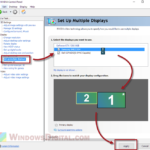
2. In the NVIDIA Control Panel window, expand Display and select Set up G-SYNC on the left pane.
3. Then, select the checkbox that says “Enable G-SYNC, G-SYNC Compatible” and select whether you want to “enable for full screen mode” only, or “enable for windowed and full screen mode“.

4. Click Apply to save the changes.
The “select the display you would like to change” section will tell you which of your monitors are G-SYNC Capable. If the “Set up G-SYNC” option is not showing up or not available in NVIDIA Control Panel, it could indicate that either no G-SYNC capable monitor is detected or your graphics card does not support G-Sync technology.
How to Enable AMD FreeSync in Windows 11
To turn on AMD FreeSync in Windows 11, follow the steps below.
1. Right-click anywhere on your desktop and select Show more options > AMD Radeon Software.

2. In the AMD Radeon Software window, select Gaming > Games. Then, click Global Display.
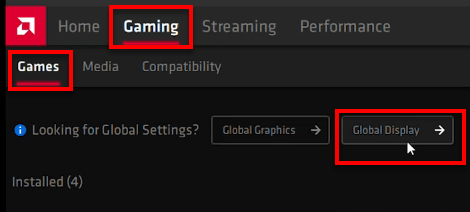
3. Under Display Options, click the toggle button next to Radeon FreeSync option to enable it.
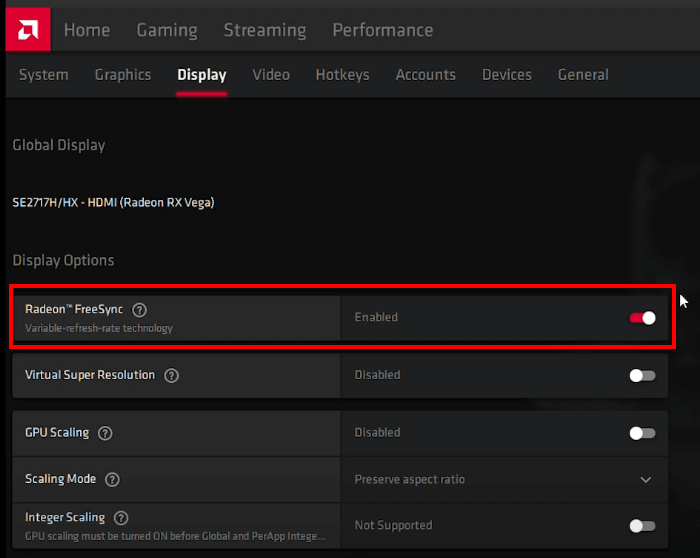
If the Radeon FreeSync option is grayed out or not available, it may indicate that either no FreeSync compatible monitor is detected or your AMD graphics card does not support FreeSync.
Tip: Limit Max FPS to -3 of monitor’s refresh rate for optimal result
Even with G-Sync or FreeSync enabled, it does not guarantee complete elimination of screen tearing issue for all games. FPS in some games can still go over your monitor refresh rate and may cause screen tearing as well as input lag issues even with G-Sync or FreeSync enabled.
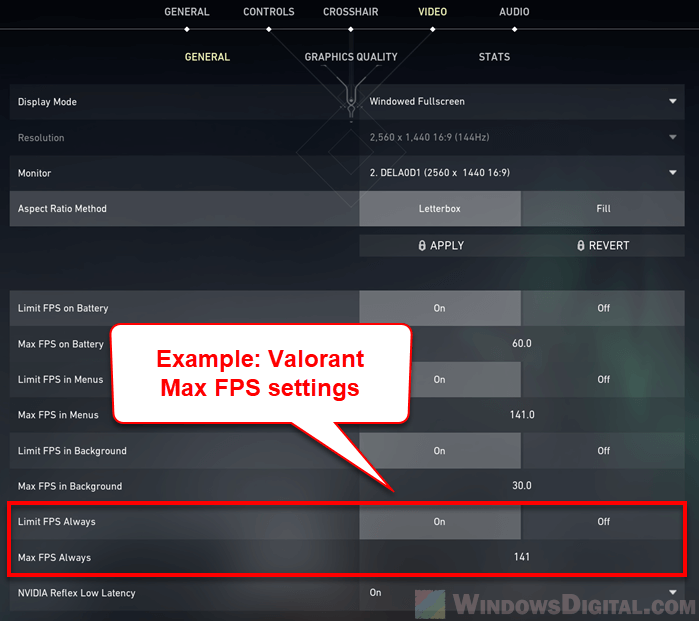
To fix this, you can try to limit the game’s max refresh rate to -3 of your monitor’s refresh rate. For example, if your monitor supports 144Hz refresh rate, limit your game’s max frame rate to 141. This is to make sure your game’s FPS will never go beyond your monitor’s refresh rate.
If there is a video settings in-game or a config file that allows you to set the max frame rate of the game, set it to -3 of your monitor’s refresh rate for optimal experience.
If there is no in-game settings that allows you to change the max FPS, you can change it via NVIDIA Control Panel’s “Max Frame Rate” settings for G-Sync users, or AMD Radeon Software’s Radeon Chill Settings for FreeSync users. See below on how to do so.
NVIDIA Max Frame Rate
For NVIDIA graphics card users, to configure max frame rate via NVIDIA Control Panel, follow the steps below.
First, search for “NVIDIA Control Panel” via Start and select the first result. In NVIDIA Control Panel window, select Manage 3D settings from the left pane. On the right pane, click Program Settings tab. Under “Select a program to customize“, click the drop-down menu and select the game you want to configure.
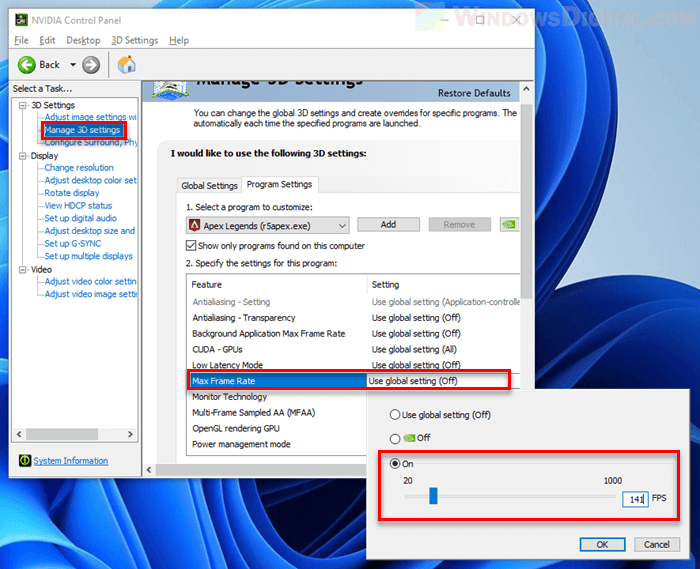
In the “Specify the settings for this program” section, look for an option called “Max Frame Rate“. Click it and select On. Then, use the slider (or manually enter) to set the max FPS for this particular game. For optimal results, set the max frame rate to -3 of your monitor’s refresh rate.
AMD Radeon Chill
For AMD Radeon users, there is a setting called Radeon Chill in the AMD Radeon Software. This setting allows you to set the minimum and maximum frame rate globally or only for a particular game to save power. You can use this feature to limit the frame rate of any game you want.
To configure the Radeon Chill settings, first open AMD Radeon Settings by right-clicking anywhere on your Windows 11 desktop and select Show more options > AMD Radeon Software.
In AMD Radeon Software window, navigate to Gaming > Games. Then, select the game you want to configure. After selecting the game, look for an option called “Radeon Chill“. Click the toggle button to enable it and you will then be able to set the Min FPS and Max FPS.
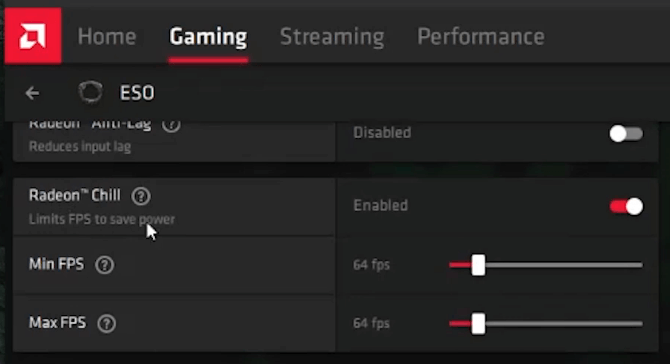
For optimal results, you should set your max frame rate to -3 of your monitor’s refresh rate. You should also make sure the min and max frame rate in the Radeon Chill settings have the same value to ensure smoother experience.