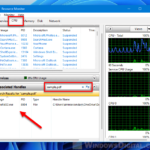
Users can set an app or game to use only certain core(s) of the CPU by setting the CPU affinity of the app’s process in Task Manager. Users can also set the CPU Priority for each process so that Windows knows which processes to prioritize when it comes to managing CPU resources.
However, the changes set in task manager last only until the process is ended. The next time you start the process, you have to set its CPU affinity and Priority again. This short tutorial will show you a trick on how to set a process CPU Affinity and Priority Permanently in Windows 11 or Windows 10.
Set CPU Affinity and Priority permanently by creating a shortcut for the process
Since we have to tell Windows which CPU affinity to use and what priority should the process be every time when you start a process, program or application, we can create a shortcut for the program with parameters that tell Windows to do so.
The next time you want to open the program, open it via the created shortcut and Windows should automatically set its CPU affinity and priority according to the parameters in the shortcut command you’ve set. Here’s how to do it.
Note that this method will only work for apps and games that run on only one process. If you need to force set the priority and CPU affinity for apps that run on multiple processes such as chrome.exe, firefox.exe or msedge.exe, read: How to Auto Set Priority and Affinity in Windows 11/10 with Script.
Page Contents
Step 1: Find out the hexadecimal value of CPU(s)
The first step is to find out the hex value of the CPU(s) to be used for CPU Affinity parameter in Step 2. To do so, first, we need to figure out the binary number of the CPU cores that you want to use for a process.
The length of binary number is determined by how many CPU cores you have. In the CPU binary number, 0 means “off” and 1 means “on”. For each CPU core that you want to use for the process, change 0 to 1.
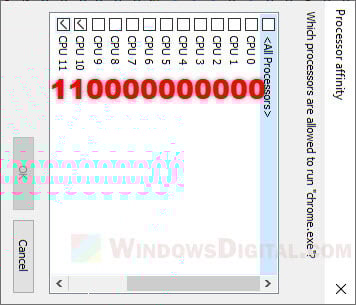
For example, in the screenshot above, I have a 12-cores CPU and I want to use only CPU 10 and CPU 11 for a certain program. Thus, the binary number of CPU I’m going to use is 110000000000.
As an extra example, if you have a 8-cores CPU and you want to use only CPU 0 for your application, the binary number to be used will be 00000001.
After getting the binary number, you need to convert it to hexadecimal number. You can use the free binary to hexadecimal converter in this page.
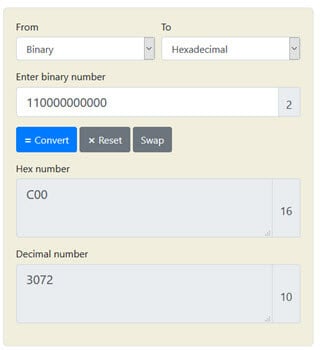
Once you get the hex number, proceed to step 2.
Step 2: Create a shortcut for the program / application
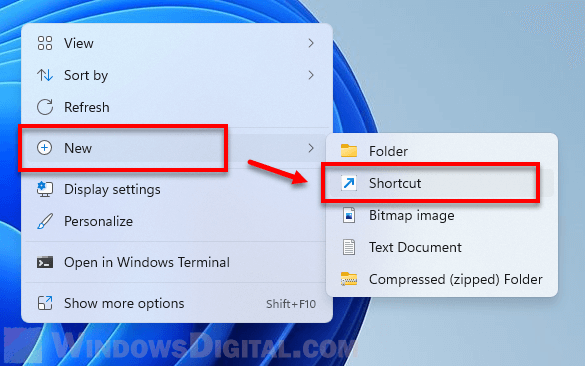
To create a shortcut for a program, right-click any empty area on desktop. In the context menu, select New, then Shortcut.
Windows 11
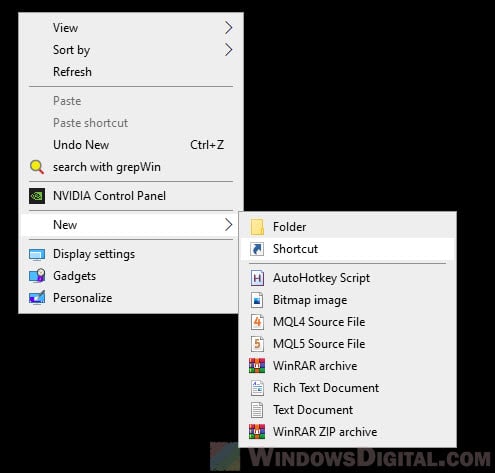
Windows 10
In the “create shortcut” window, under “Type the location of the item” field, enter the following command.
cmd.exe /c start "Program name" /High /affinity # "Program's path"
- Replace “Program name” with the actual name of the program (can be empty or any name).
- Replace “High” with any CPU priority you want to set for the process. The available options are: Realtime, High, Above Normal, Normal, Below Normal, Low.
- Replace “#“ with the Hexadecimal value you’ve obtained from Step 1.
- Replace “Program’s path” with the full path of the program or application.
For example, if I want to run “League of Legends” on only CPU 10 and CPU 11 at High CPU Priority, I would use the command below.
cmd.exe /c start "League of Legends" /High /affinity C00 "Z:\Games\Riot Games\League of Legends\LeagueClient.exe"

Click Next when you’re done. In the next page, type a name for this shortcut (any name you prefer).

Finally, click Finish to complete creating the shortcut.

From now onward, if you want to run the program, run this shortcut instead. When you run the shortcut, Windows will automatically launch the program with the CPU affinity and Priority you’ve set in the shortcut’s command parameters.