When you connect a secondary monitor, TV, projector, or other type of display to your computer, Windows will randomly assign a position to the connected display. Your computer is not smart enough to detect the physical location of your monitors and assign them matching positions. You will need to manually arrange the position of the screens in Windows to match the way you place them in real life.
This guide shows you two methods on how to change the order and position of your monitors in Windows 11 and arrange them however you want.
Also see: How to Switch Between Monitors on Windows 11
Page Contents
Change position of monitors in Windows 11
You can manage all your connected displays via the Display Settings in Windows 11. From there, you can change settings such as how you want a connected monitor to work on your setup (e.g. extend desktop to the monitor or duplicate your primary monitor), how you want to position the monitors, scaling, screen resolution, etc.
To manage your connected displays or change the monitor position in Windows 11, follow the steps below.
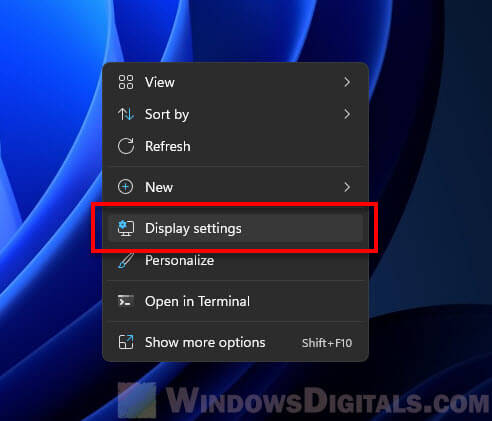
- Right-click anywhere on the desktop and select Display Settings. Alternatively, you can press Win + i to open Settings and navigate to System > Display.
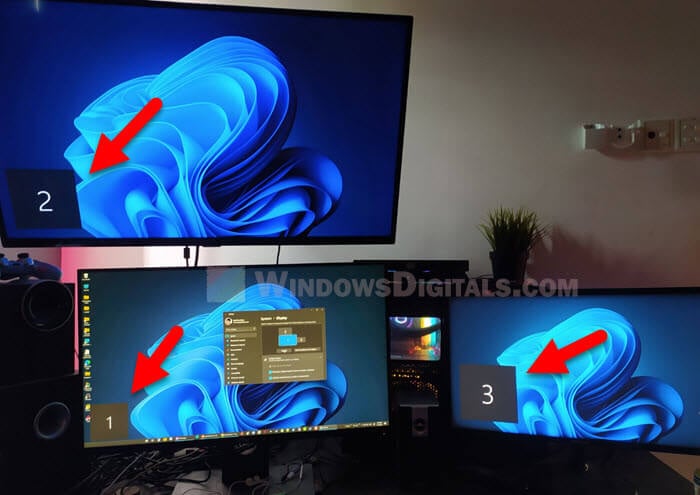
- In the display settings, click the Identify button if you need to know which monitor is which.
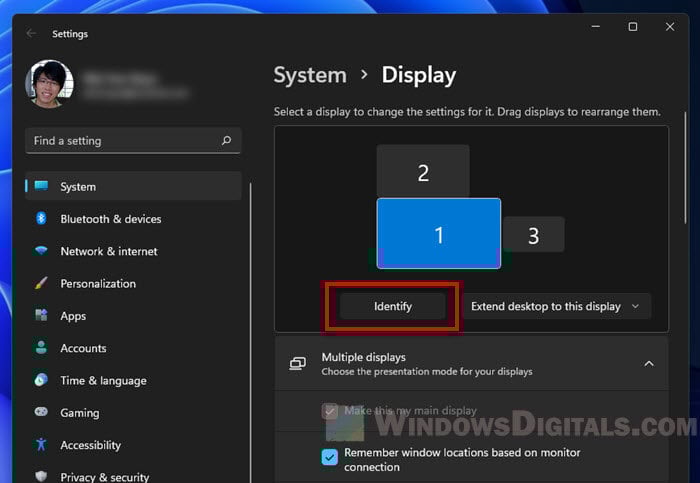
- The numbers representing the monitors will then be displayed on your monitors respectively. “Monitor 1” is usually your primary display.
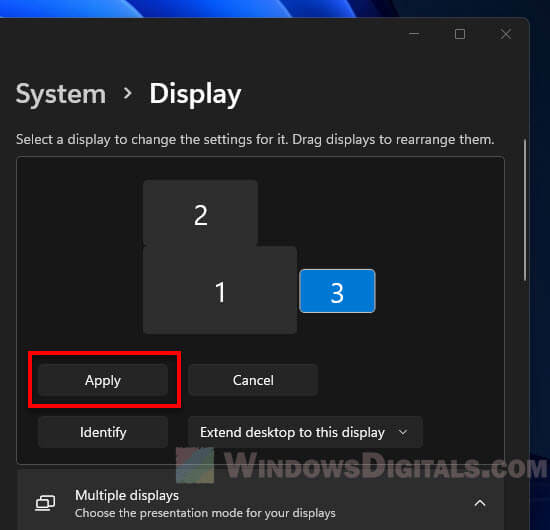
- To change the position of a monitor, click and drag the monitor to where you want to place it.
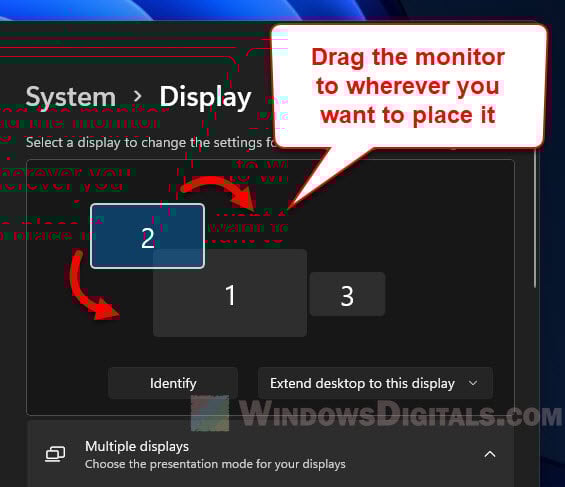
- Once you have made any changes, the “Apply” and “Cancel” buttons will appear. Click “Apply” to save the changes, or “Cancel” to undo the changes.
- Once applied, your screen will flash for a split second indicating that the changes has been made. You can test it by moving your mouse cursor to the direction where you placed your monitor.
If you do not see your second monitor in the display settings, this may indicate that Windows couldn’t detect the monitor, so it thinks the monitor does not exist. If this is the case, see: Second Monitor Not Detected in Windows 11.
Remember window locations
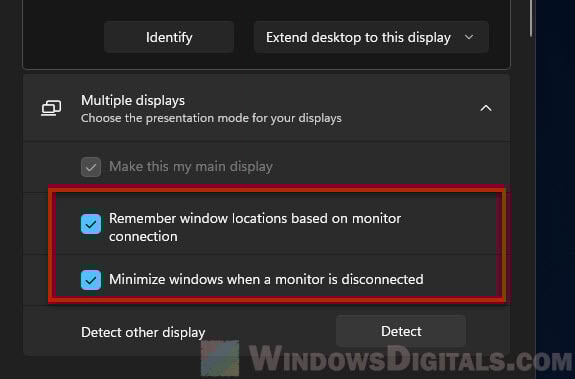
In Windows 11, there are two additional options that may come in handy when you often need to disconnect your monitor.
- Remember window locations based on monitor connection – If this option is turned on, Windows will remember the locations of the opened windows when you disconnect the monitor. When you reconnect the monitor, Windows will put everything back exactly like as it was before you disconnected it.
- Minimize windows when a monitor is disconnected – If this option is enabled, Windows will try to minimize the windows that are open in the monitor when you disconnect the monitor.
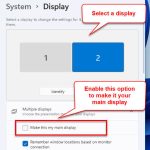
You can also quickly change the main display by first selecting the display you want to set as primary, then select the “Make this my main display” option.
Related issue: Windows 11 Different Wallpaper on Each Monitor Not Working
Change monitor position via NVIDIA Control Panel
Alternatively, if you have an NVIDIA graphics card and have installed its drivers correctly, you can change the position of all connected monitors and other settings through the NVIDIA Control Panel. Here’s how to do it.
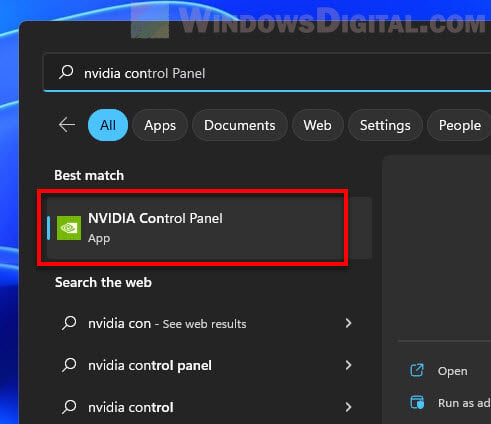
- Go to the Start menu, search for “NVIDIA Control Panel” and open it.
- In the control panel window, click “Display” on the left pane to expand it.
- Then, select “Set up multiple displays“.
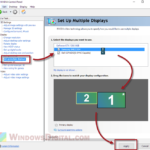
- On the right pane, first select the display you want to manage.
- Next, in the bottom section, drag and drop the selected monitor to where you want to position it. The numbers below the monitor show the current X and Y coordinates of the monitor.
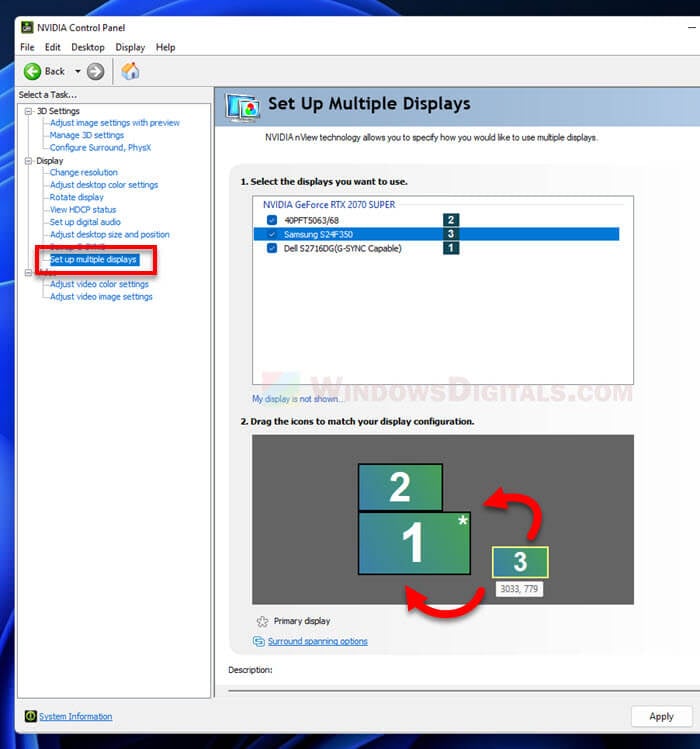
- Once you’re done, click Apply to save the changes.